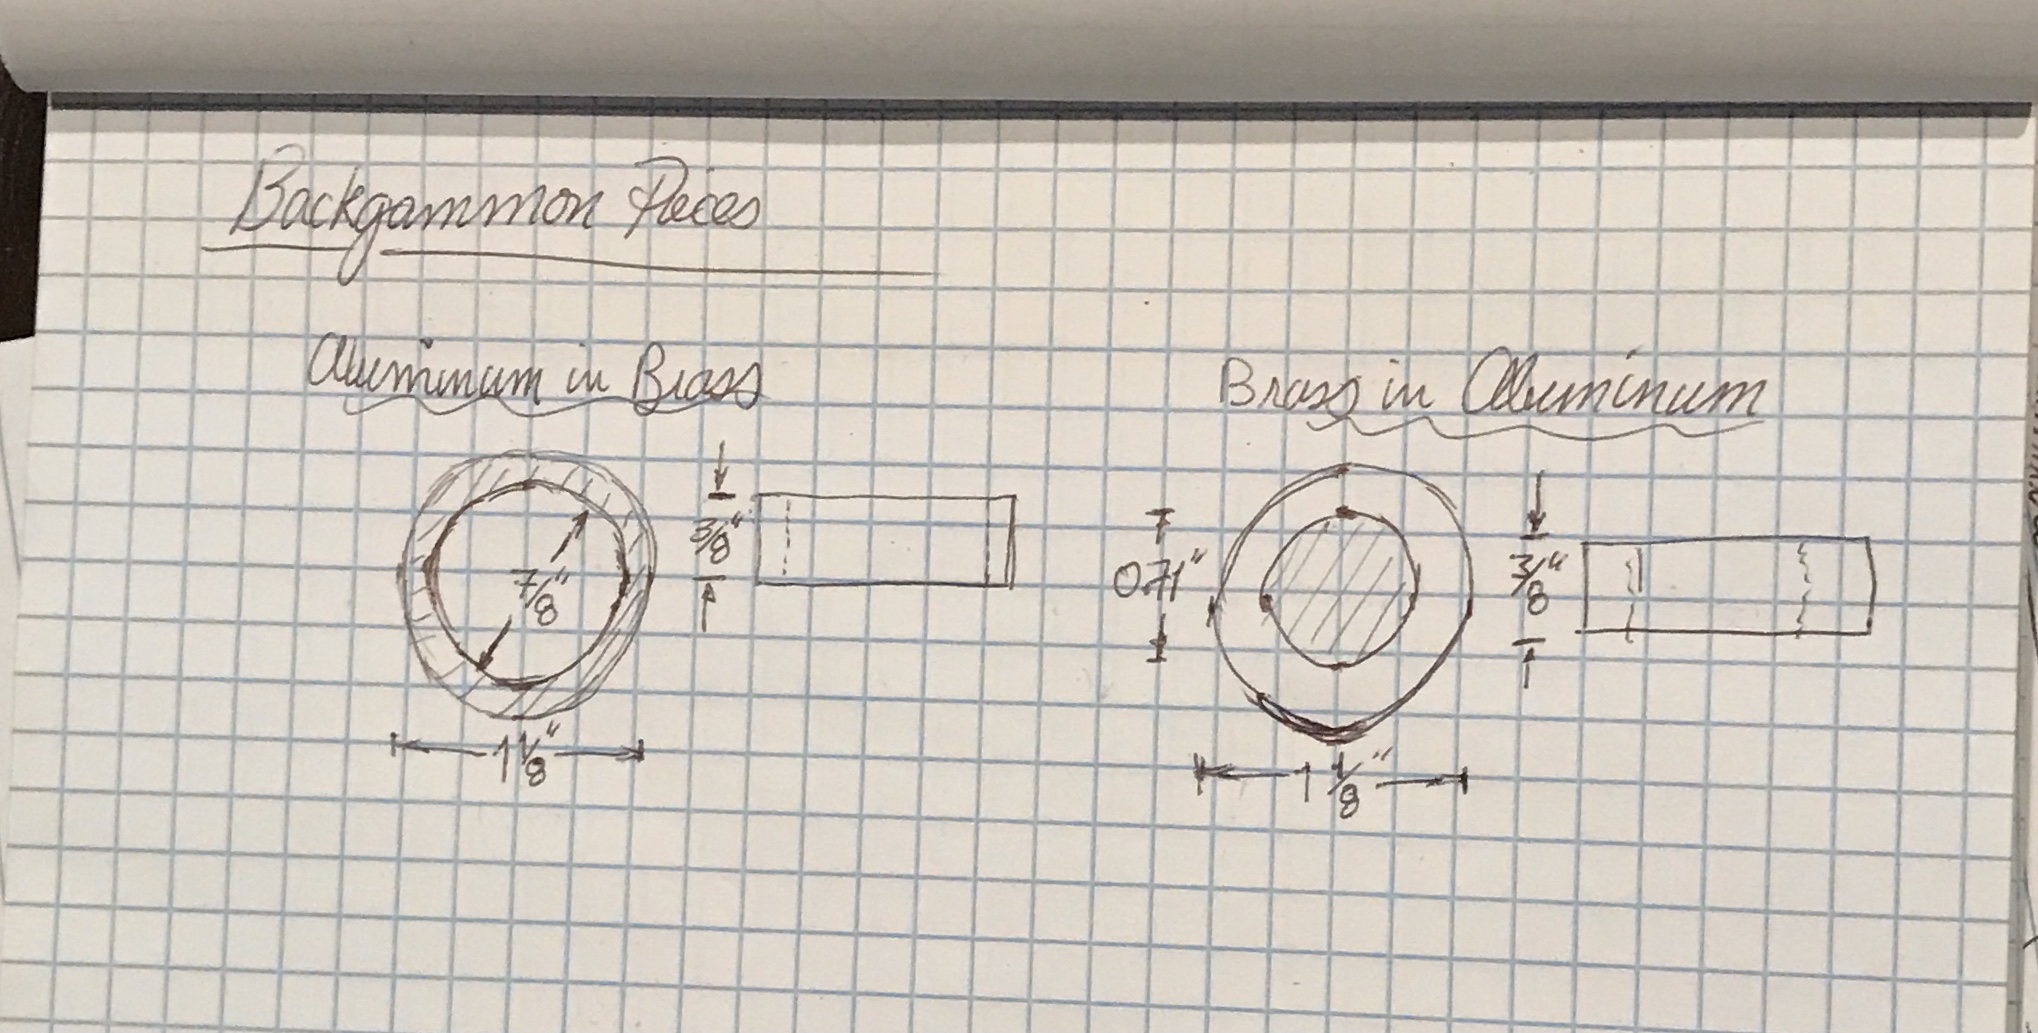
The backgammon board requires pieces, two sets of 15. As described in the backgammon board write-up the pieces will be made from brass and aluminum. Both sets will be 1 1/8" diameter and 1/4" - 5/16" thick. One set will be brass with aluminum in the middle and the other will be aluminum with brass in the middle. The brass tubes are 1/8" thick. To match the weight a rough calculation indicates the brass center in the aluminum tube should be 0.71" in diameter.
Making the set using the brass tube will be significantly easier. I have 3' of 1" diameter aluminum rod. This will be turned to a press fit in the brass tubes. The brass tube will be cut into appropriate lengths. The aluminum after reducing to size will also be cut into matching lengths. These will be pressed into the brass tubes. This can be done with a vise or by heating the brass and cooling the aluminum. The brass tubes with aluminum centers will be faced on both sides to produce the correctly sized piece. The corners should be heavily chamfered or rounded. A design, yet to be determined, will be cut into the aluminum centers.
The second set with aluminum tubes requires boring the aluminum to size, 0.710". This will be done in sections as my boring bar can at most cut 2-3" deep. The aluminum tube will then be cut into pieces. The 3/4" brass round bar will be cut into matching discs. These brass discs will be press fit into the aluminum tubes. Again, a simple design will be cut into the brass centers.
A more detailed calculation of the aluminum tube ID, wherein the density and quantity of both metals was taken into account, was carried out by hand and with a spreadsheet. The formula used was as follows:
((BTOD/2)2 - (BTID/2)2)xδB + (BTID/2)2xδA =
((BTOD/2)2 - r2)xδA + r2xδB
Where BTOD is the OD of the brass tube, BTID is the ID of the brass tube, δB is the density of Brass in lbs/cu in, δA is the density of aluminum, and r is the inside radius of the aluminum tube. This calculation gave a result of 0.707" for the ID of the aluminum tube.
Of course the answers are identical!! There is no need to take the aluminum into account. The volume of the aluminum is identical if the brass volumes are identical!
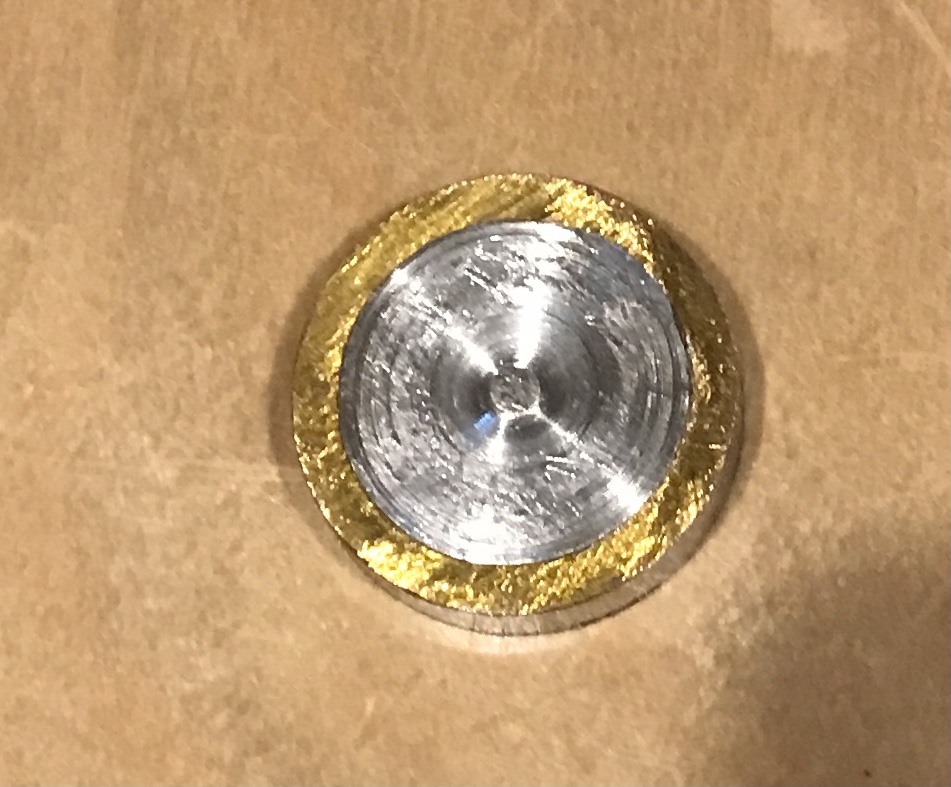
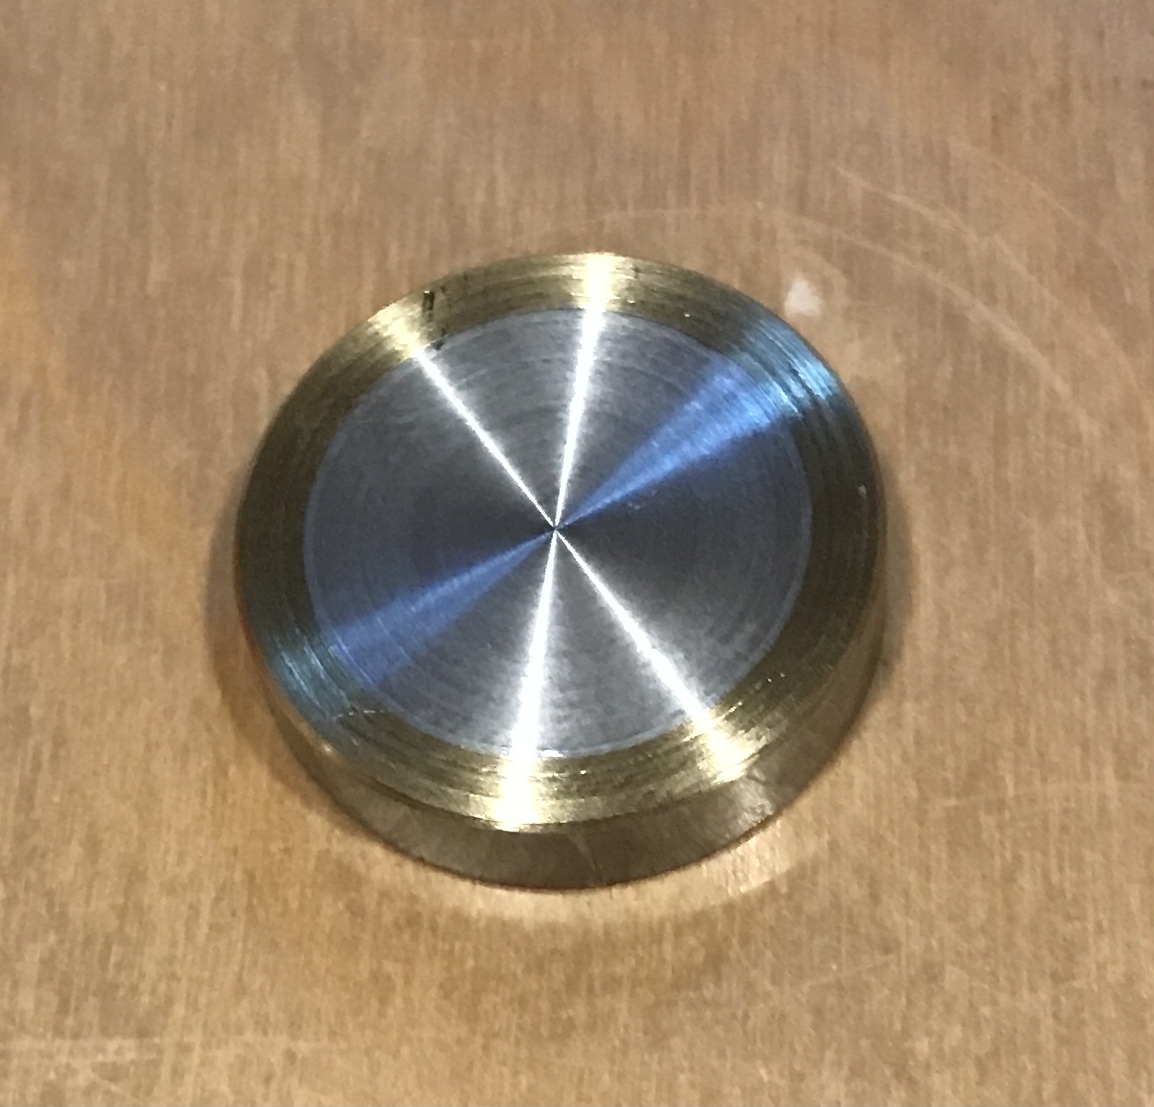
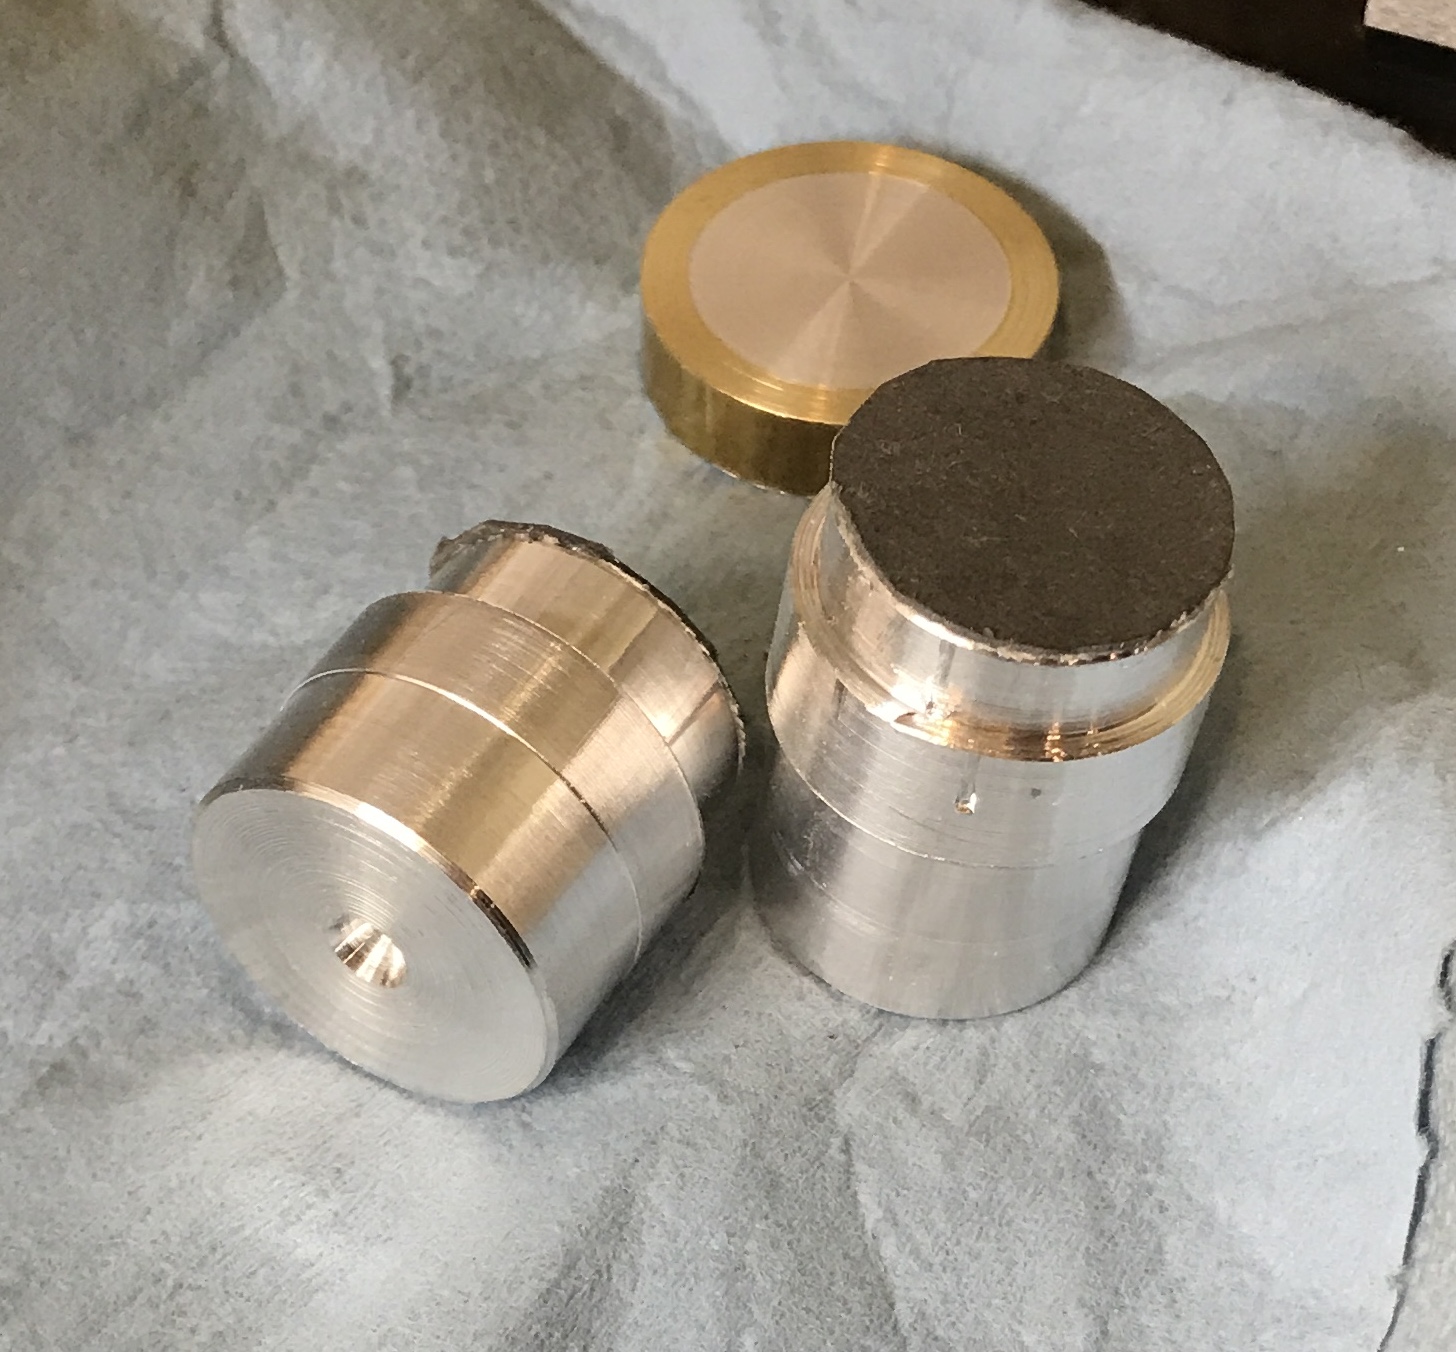
A trial piece was made this morning. A ring of brass was cut off at slightly over 1/4". A 3/4" length of 1" aluminum rod was also cut off with the hacksaw. The aluminum was placed in the three jaw chuck in the Sherline lathe. The diameter was reduced to 0.875 (about 1/4 thou over) for 3/8". A 0.30" length was parted off. The aluminum could not be pressed into the brass ring by hand. The brass ring was heated with a flame, set on a steel plate, and the aluminum was hammered into place. I don't know if the heating was needed. The two photos below show the two sides of the piece at this stage.
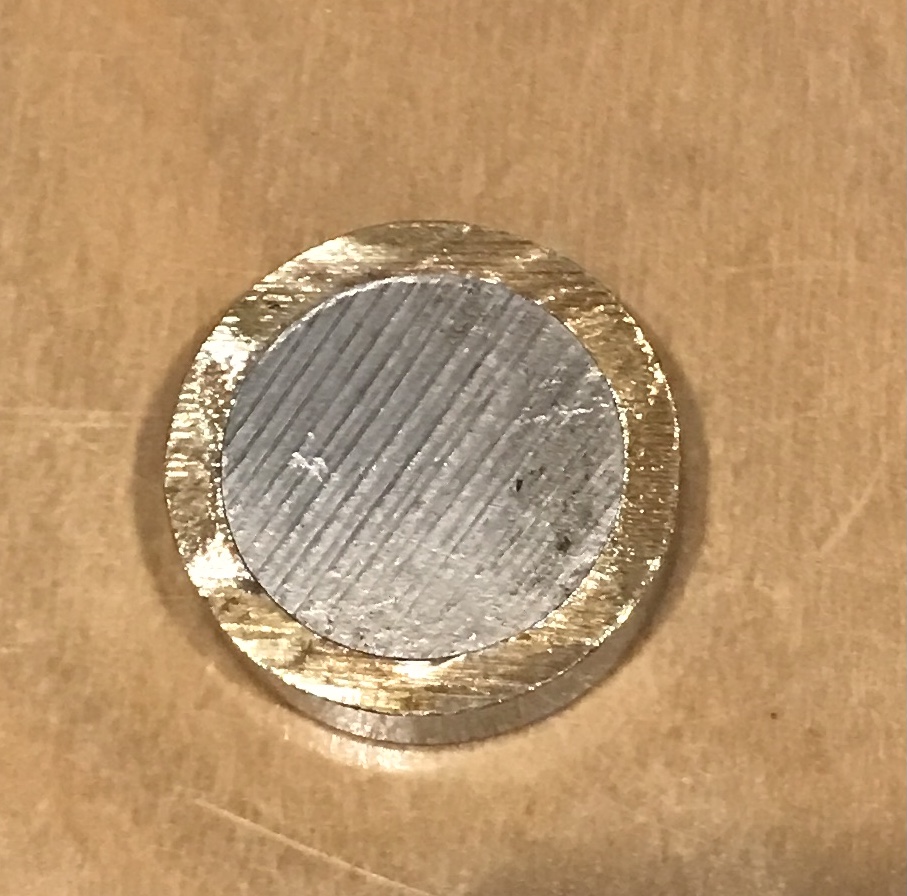
The piece was faced on both sides until it was slightly over 0.250" thick. Parallels were used to align the disk for facing. The sides were then chamfered with a file, coarse followed by fine. The piece is shown below. It definitely will look better after sanding and polishing.
The disc was sanded with progressively finer grits: 120, 220, 320, 400, 600, 1000, & 2000. Scratches were visible up to 1000 grit. The sanding with the 2000 grit got rid of most of the scratches leaving a matte finish. Interestingly, the aluminum turned gray. This is most likely embedded brass particles. Soap and water did not change anything except my fingers were cleaned.
I saw a tip to use Q-tips for polishing. The Q-tip is cut off and fits nicely in the Dremel. Red rouge or other can be applied for polishing. In this case taping one metal and polishing the other might avoid the cross contamination.
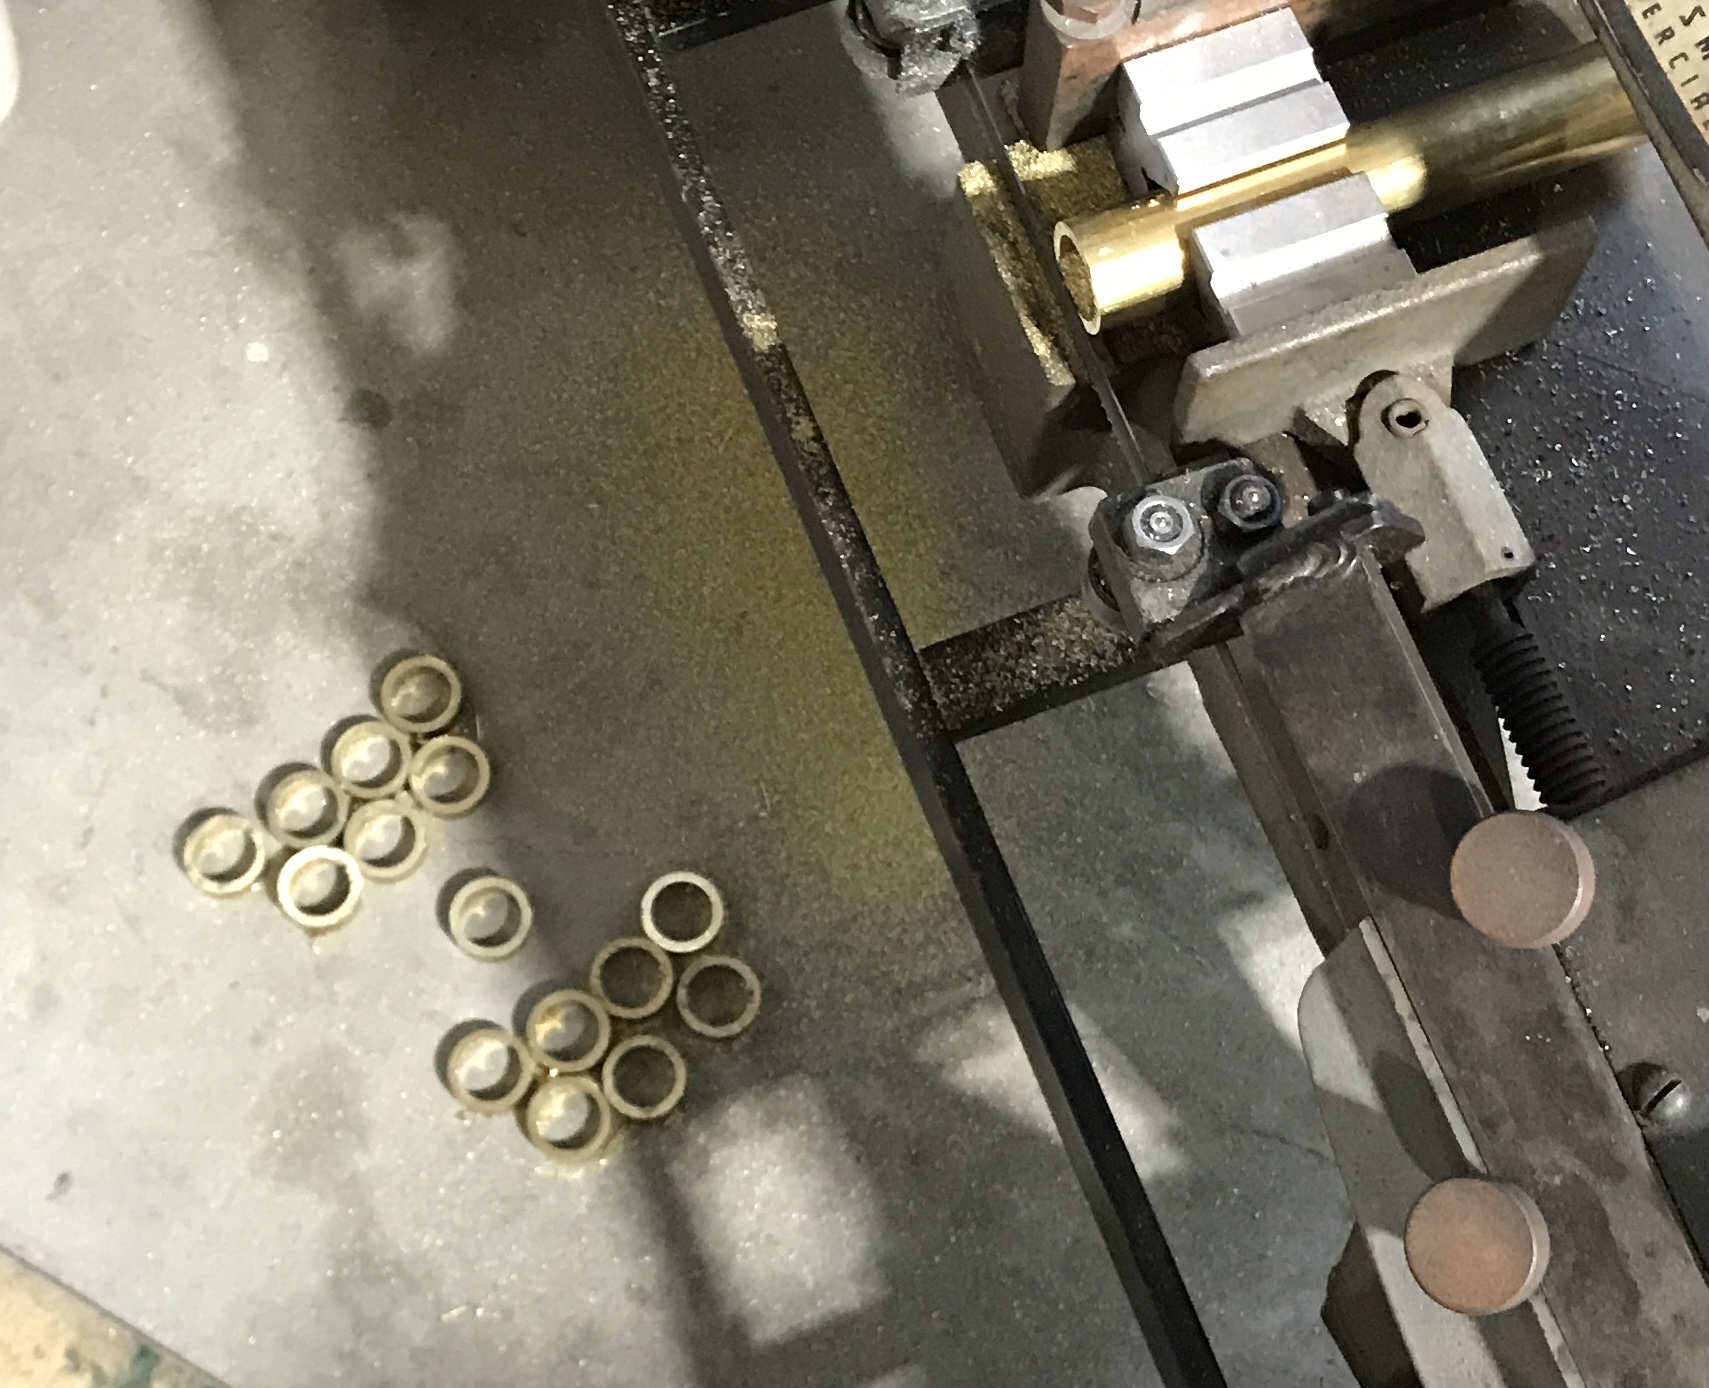
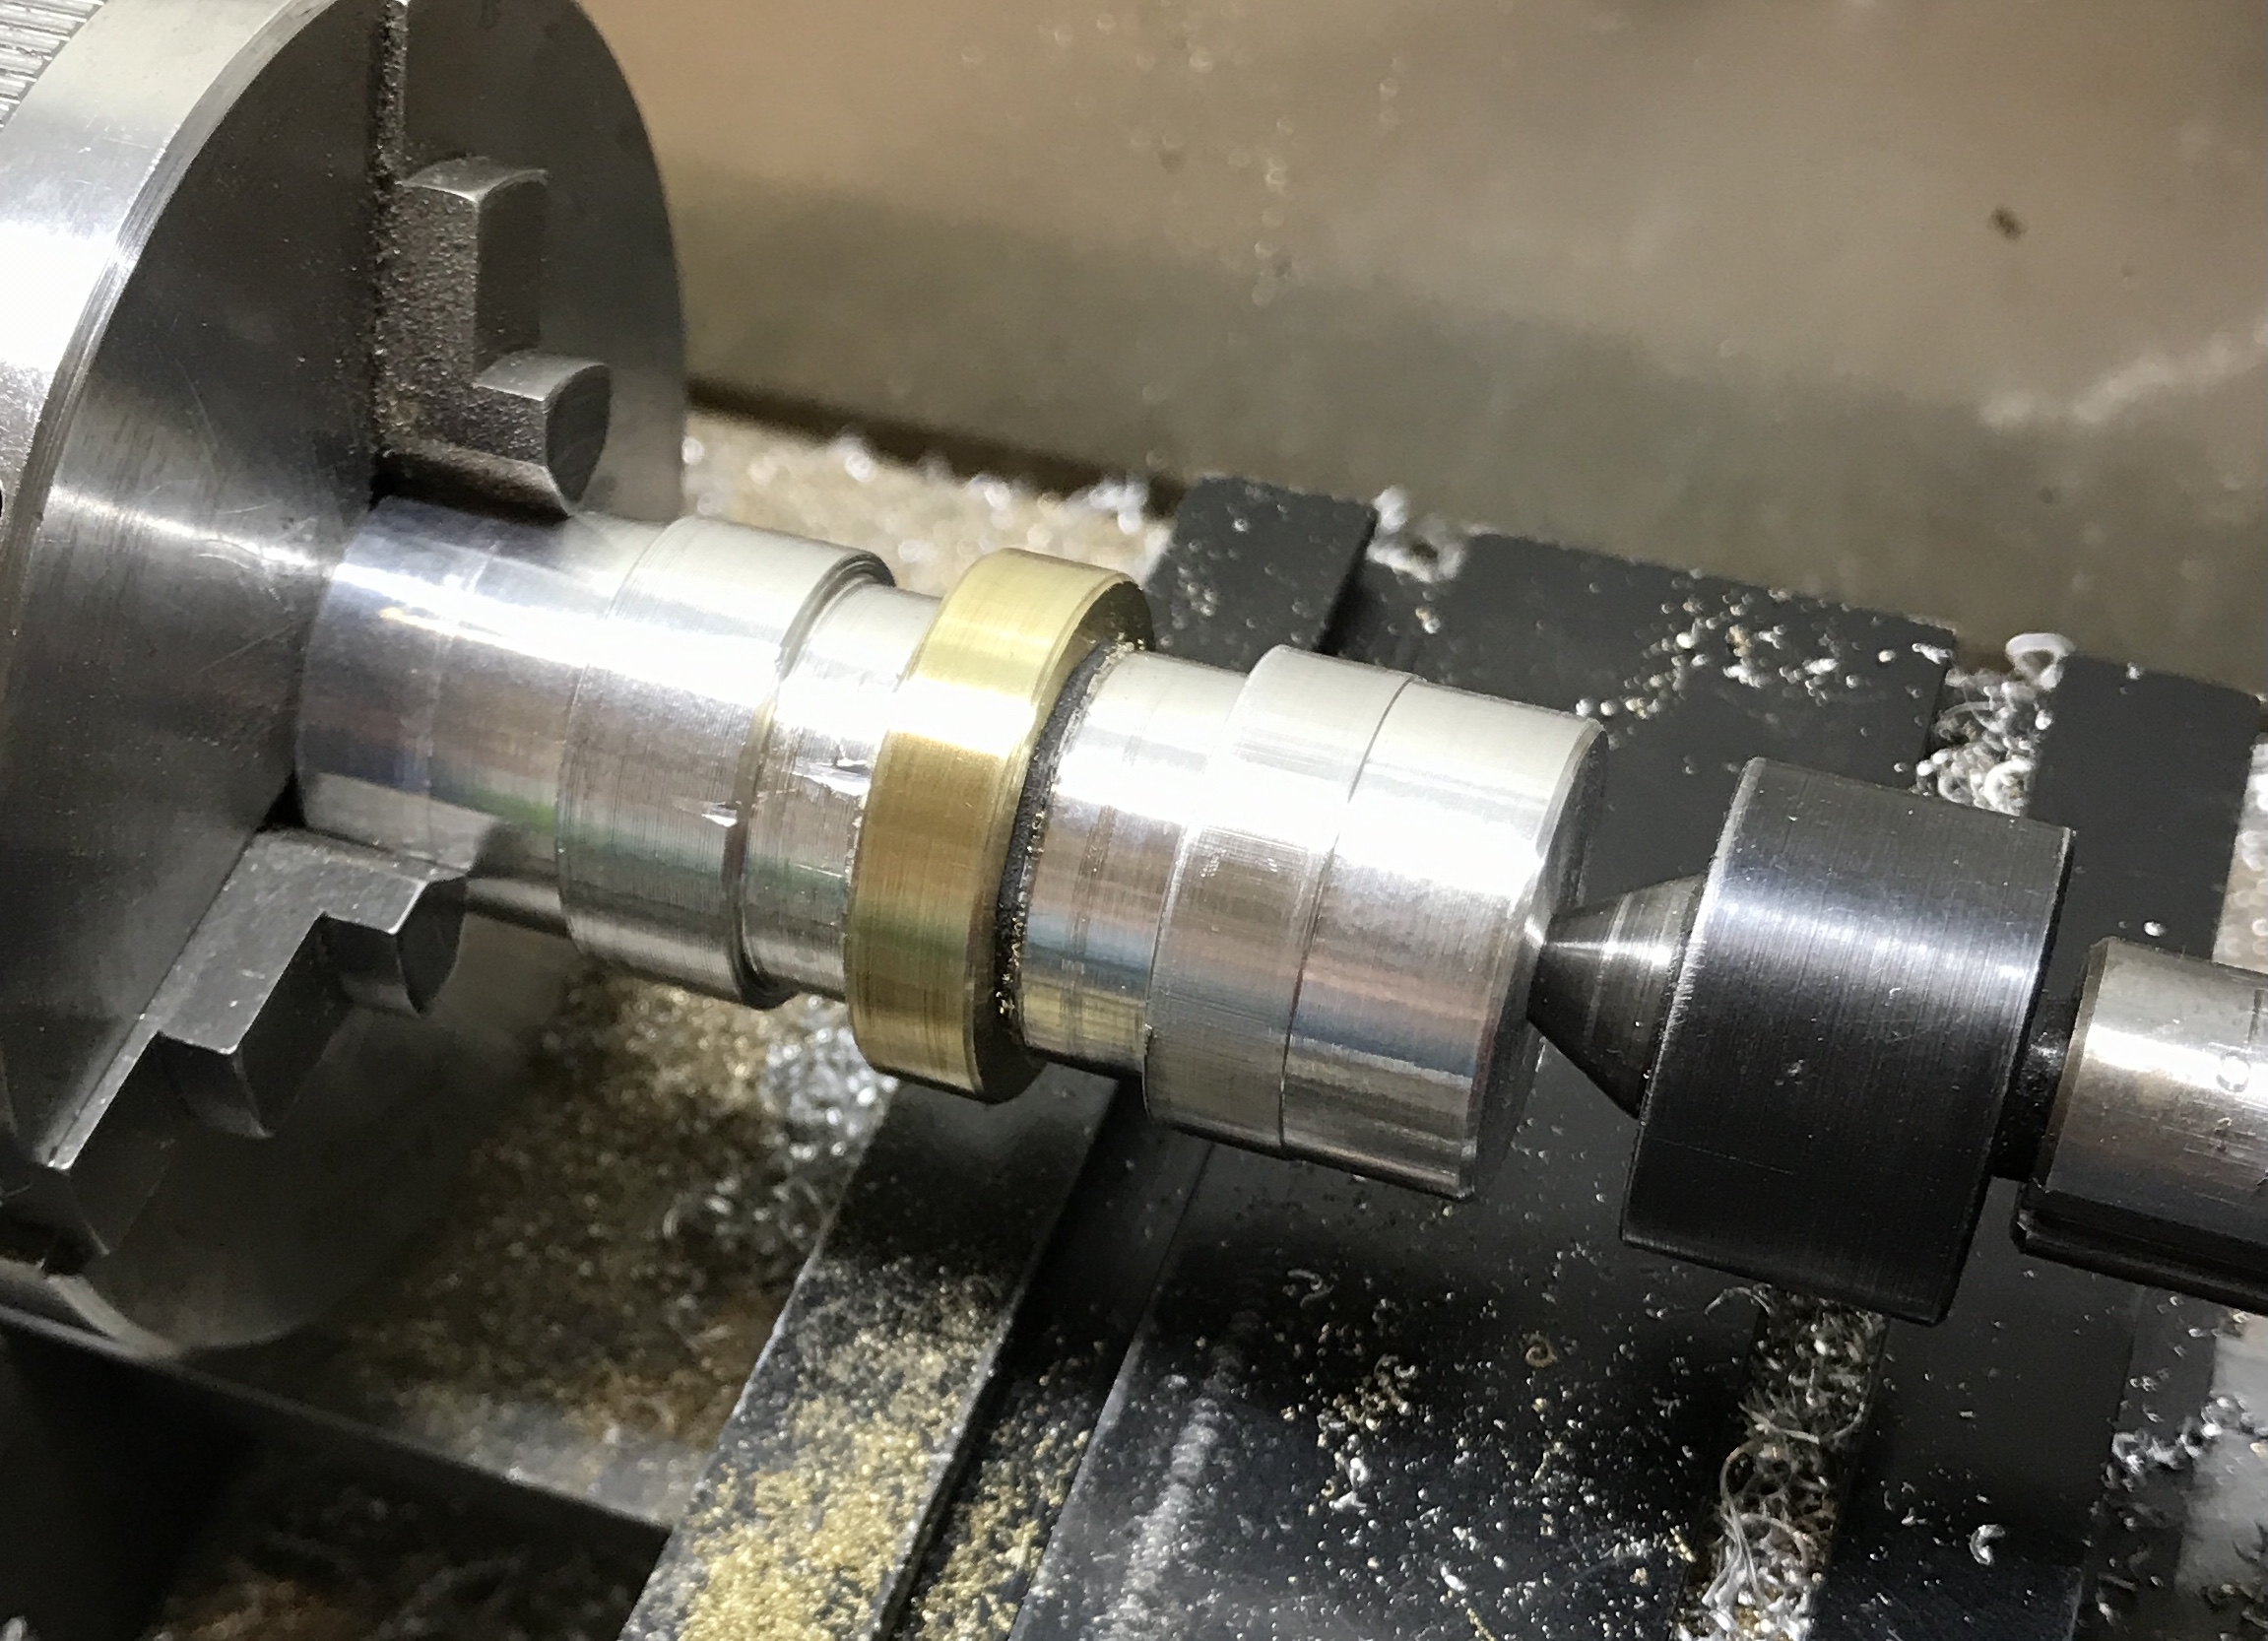
It really is 50° out today, February 9, so back to the garage. This time the focus is on the backgammon pieces not the piece holders. I will start with the brass tubes filled with aluminum, as these are a little simpler. The brass tube will be cut into 5/16" lengths with the bandsaw. It will be held in the bandsaw vise with V-blocks. With one already completed fourteen more are required. Preparing the aluminum disks will be the perfect opportunity to try out the new QCTP. Prepping these disks will consist of reducing a length to size (0.875"+) and parting off. There is no point in facing until after the aluminum disks have been pressed into the brass rings.
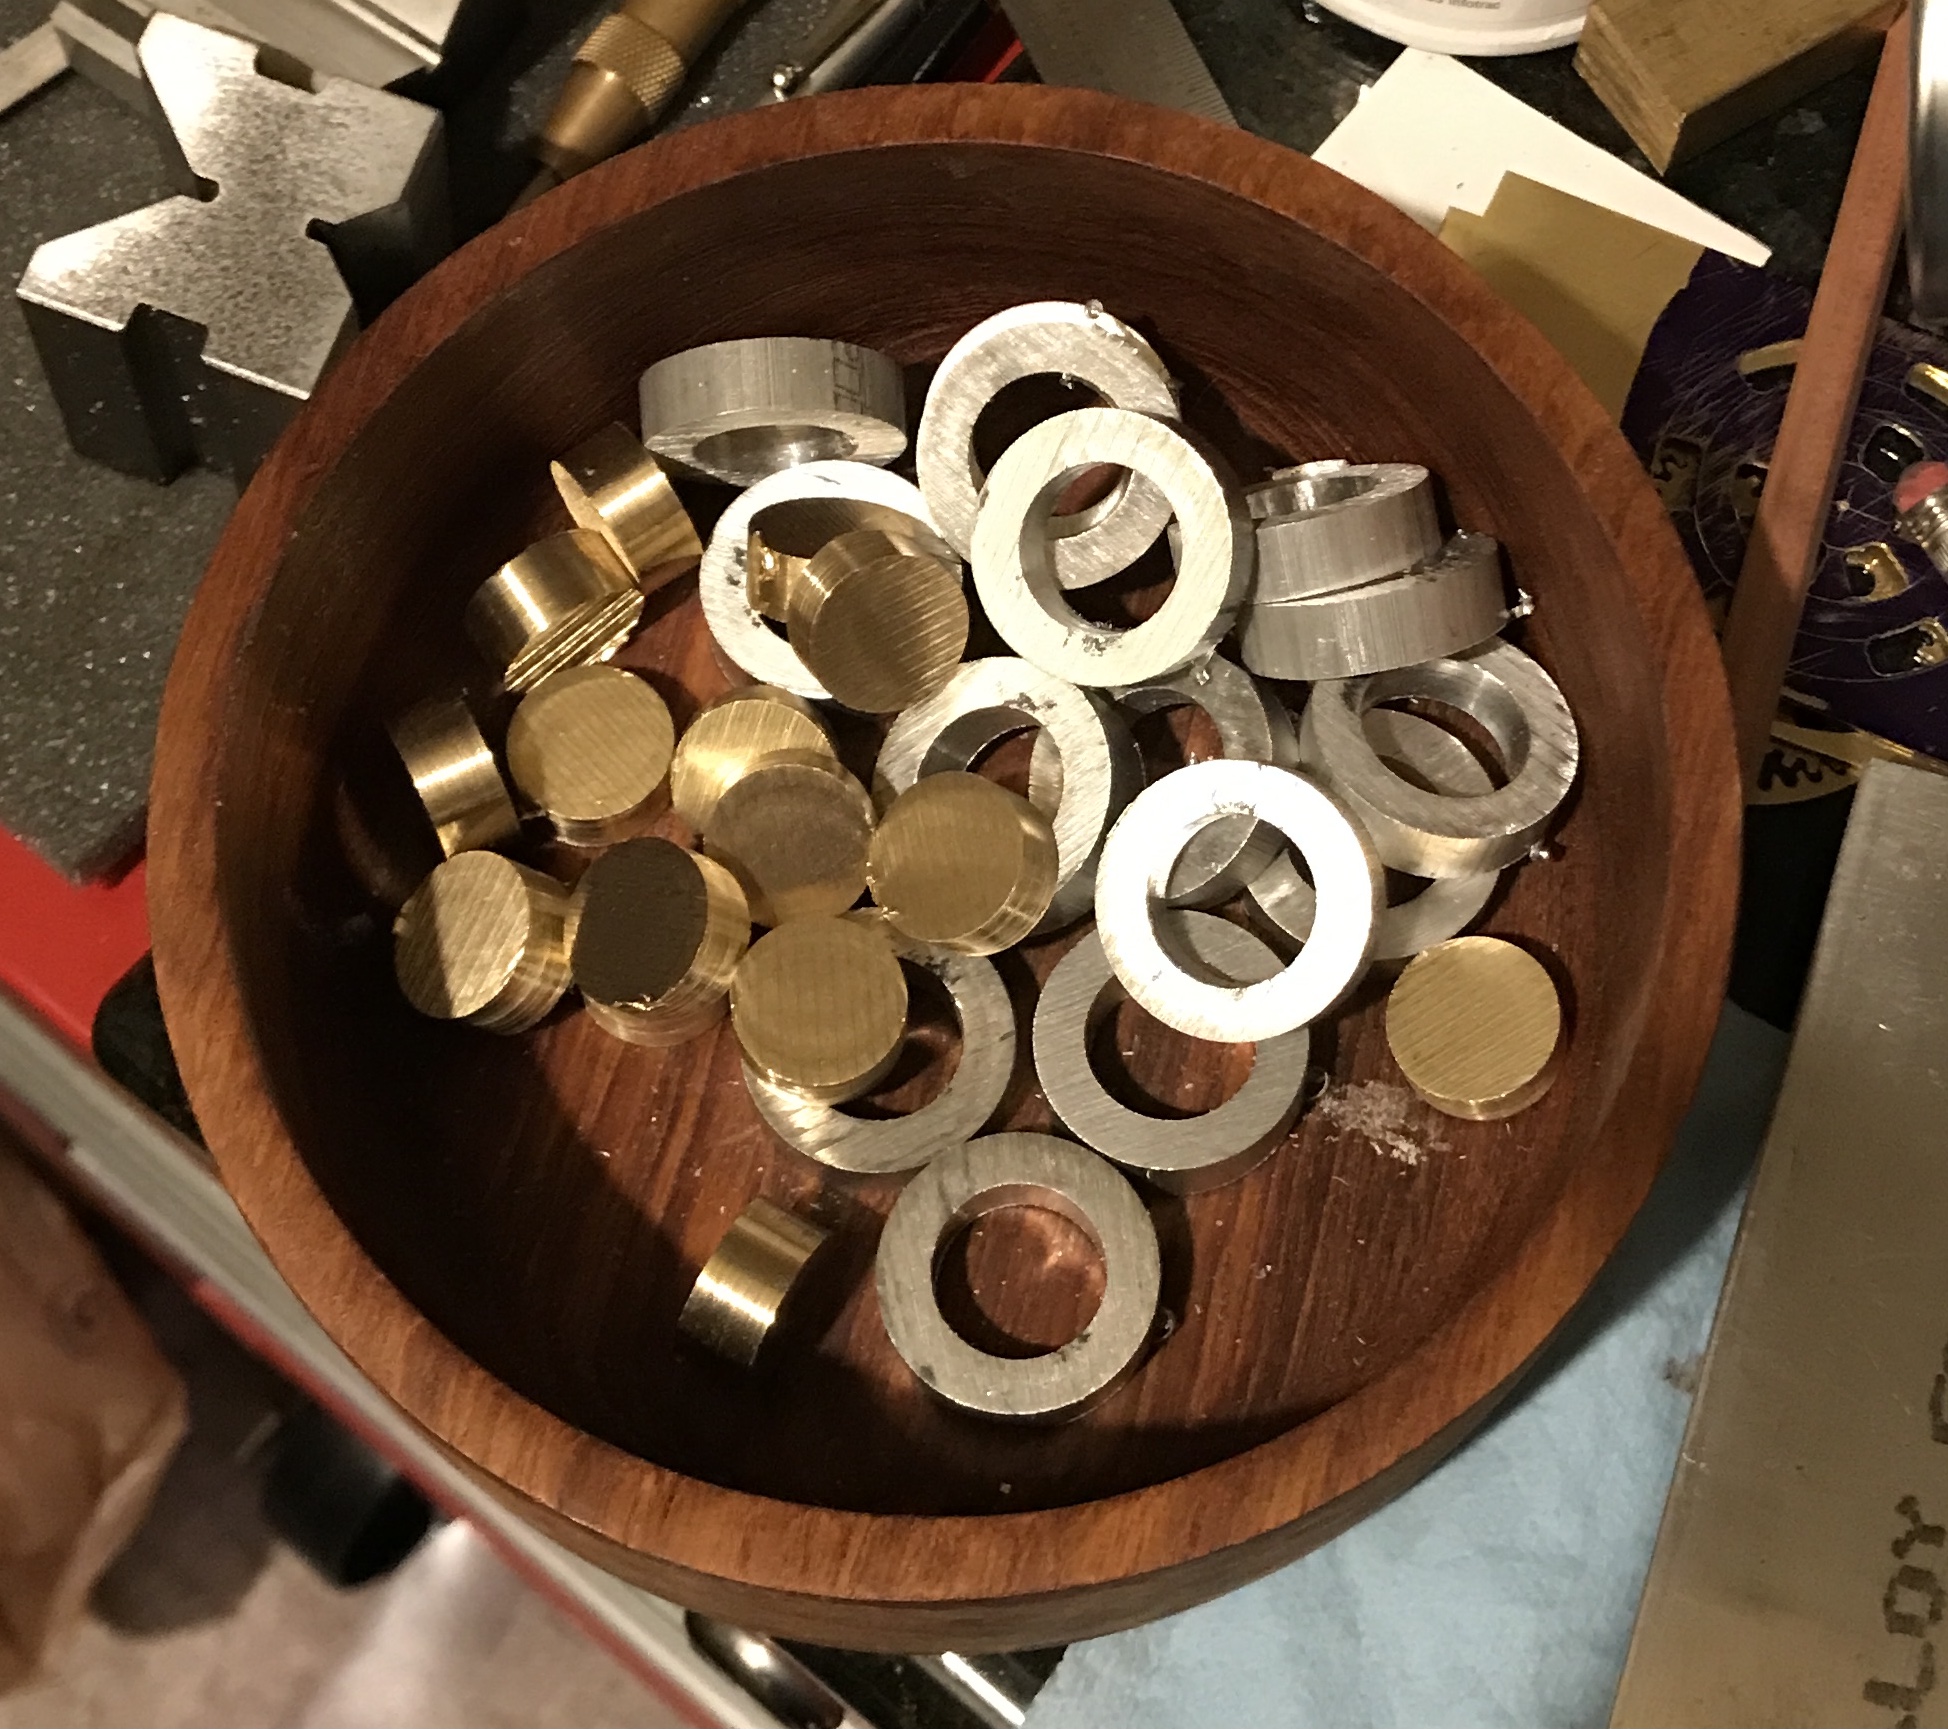
The brass rings were cut from the brass tube with the bandsaw very simply. The photo below shows these disks. Fifteen were cut as a spare is always a good idea. The aluminum was more challenging. Parting off was not successful. A modified regimen was followed in which about an inch of material was reduced to the correct diameter. The material was removed from the lathe and held in the bandsaw where three or four disks were cut off. The aluminum rod was returned to the lathe for another round. In the end all of the disks were completed. The second photo below shows the rough cut rings and disks.
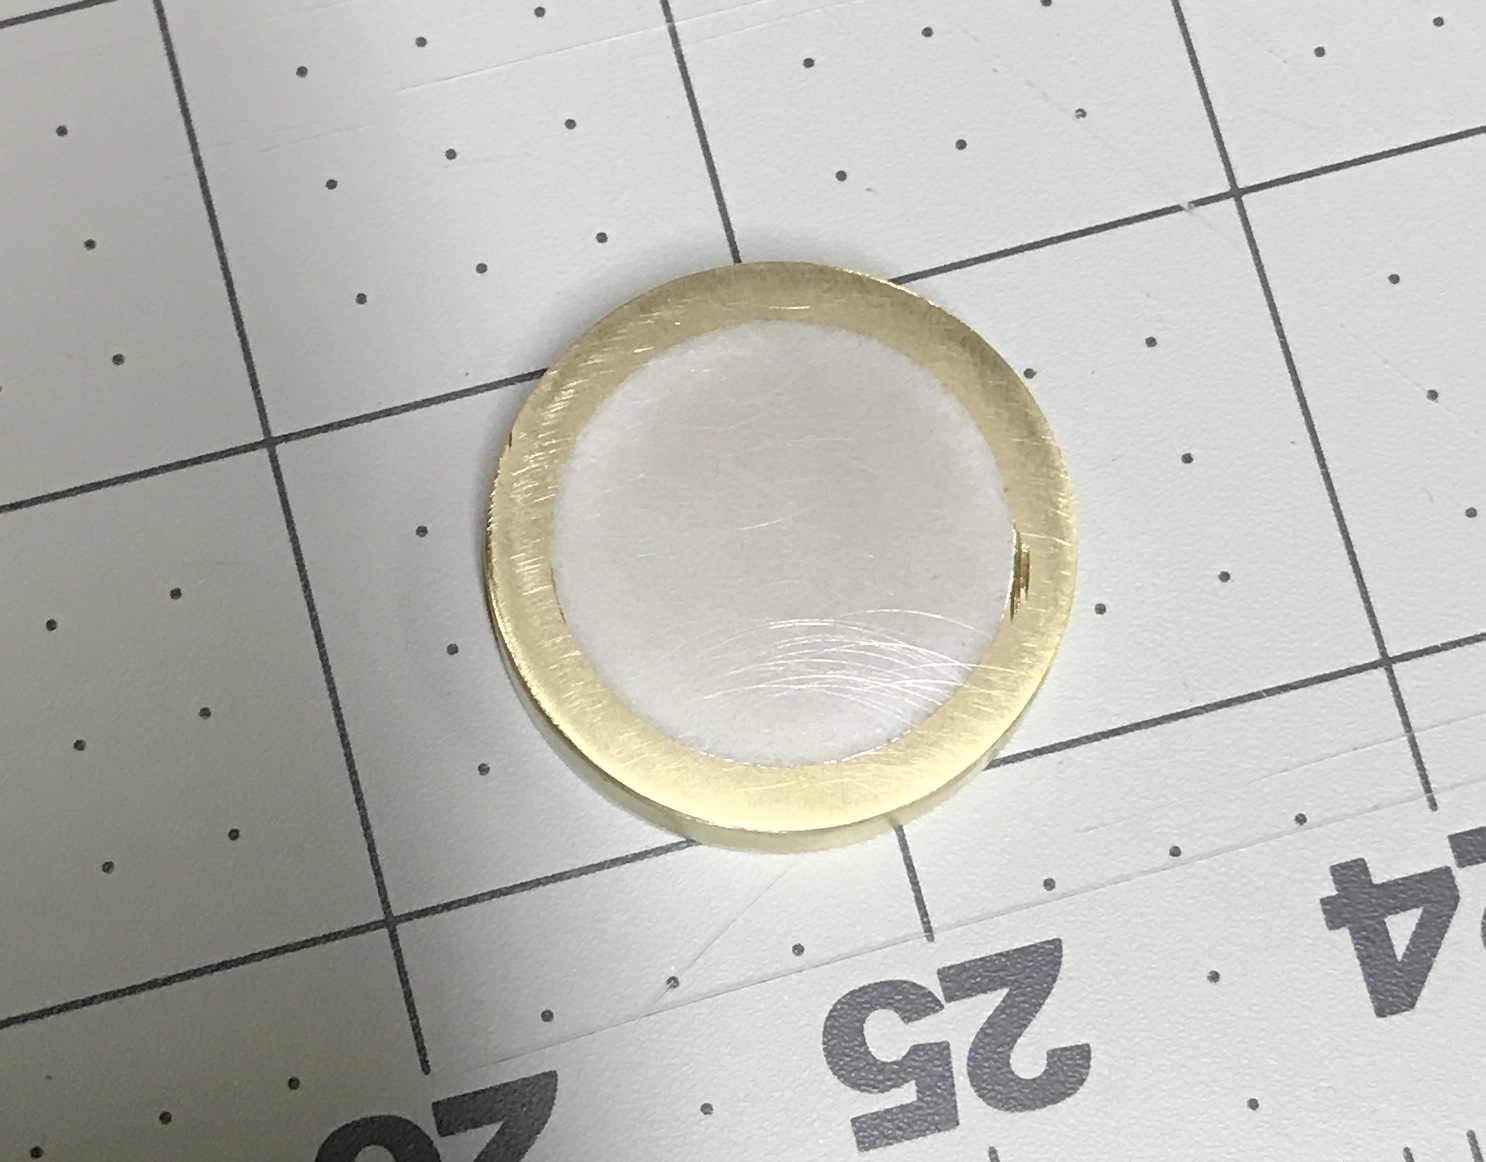
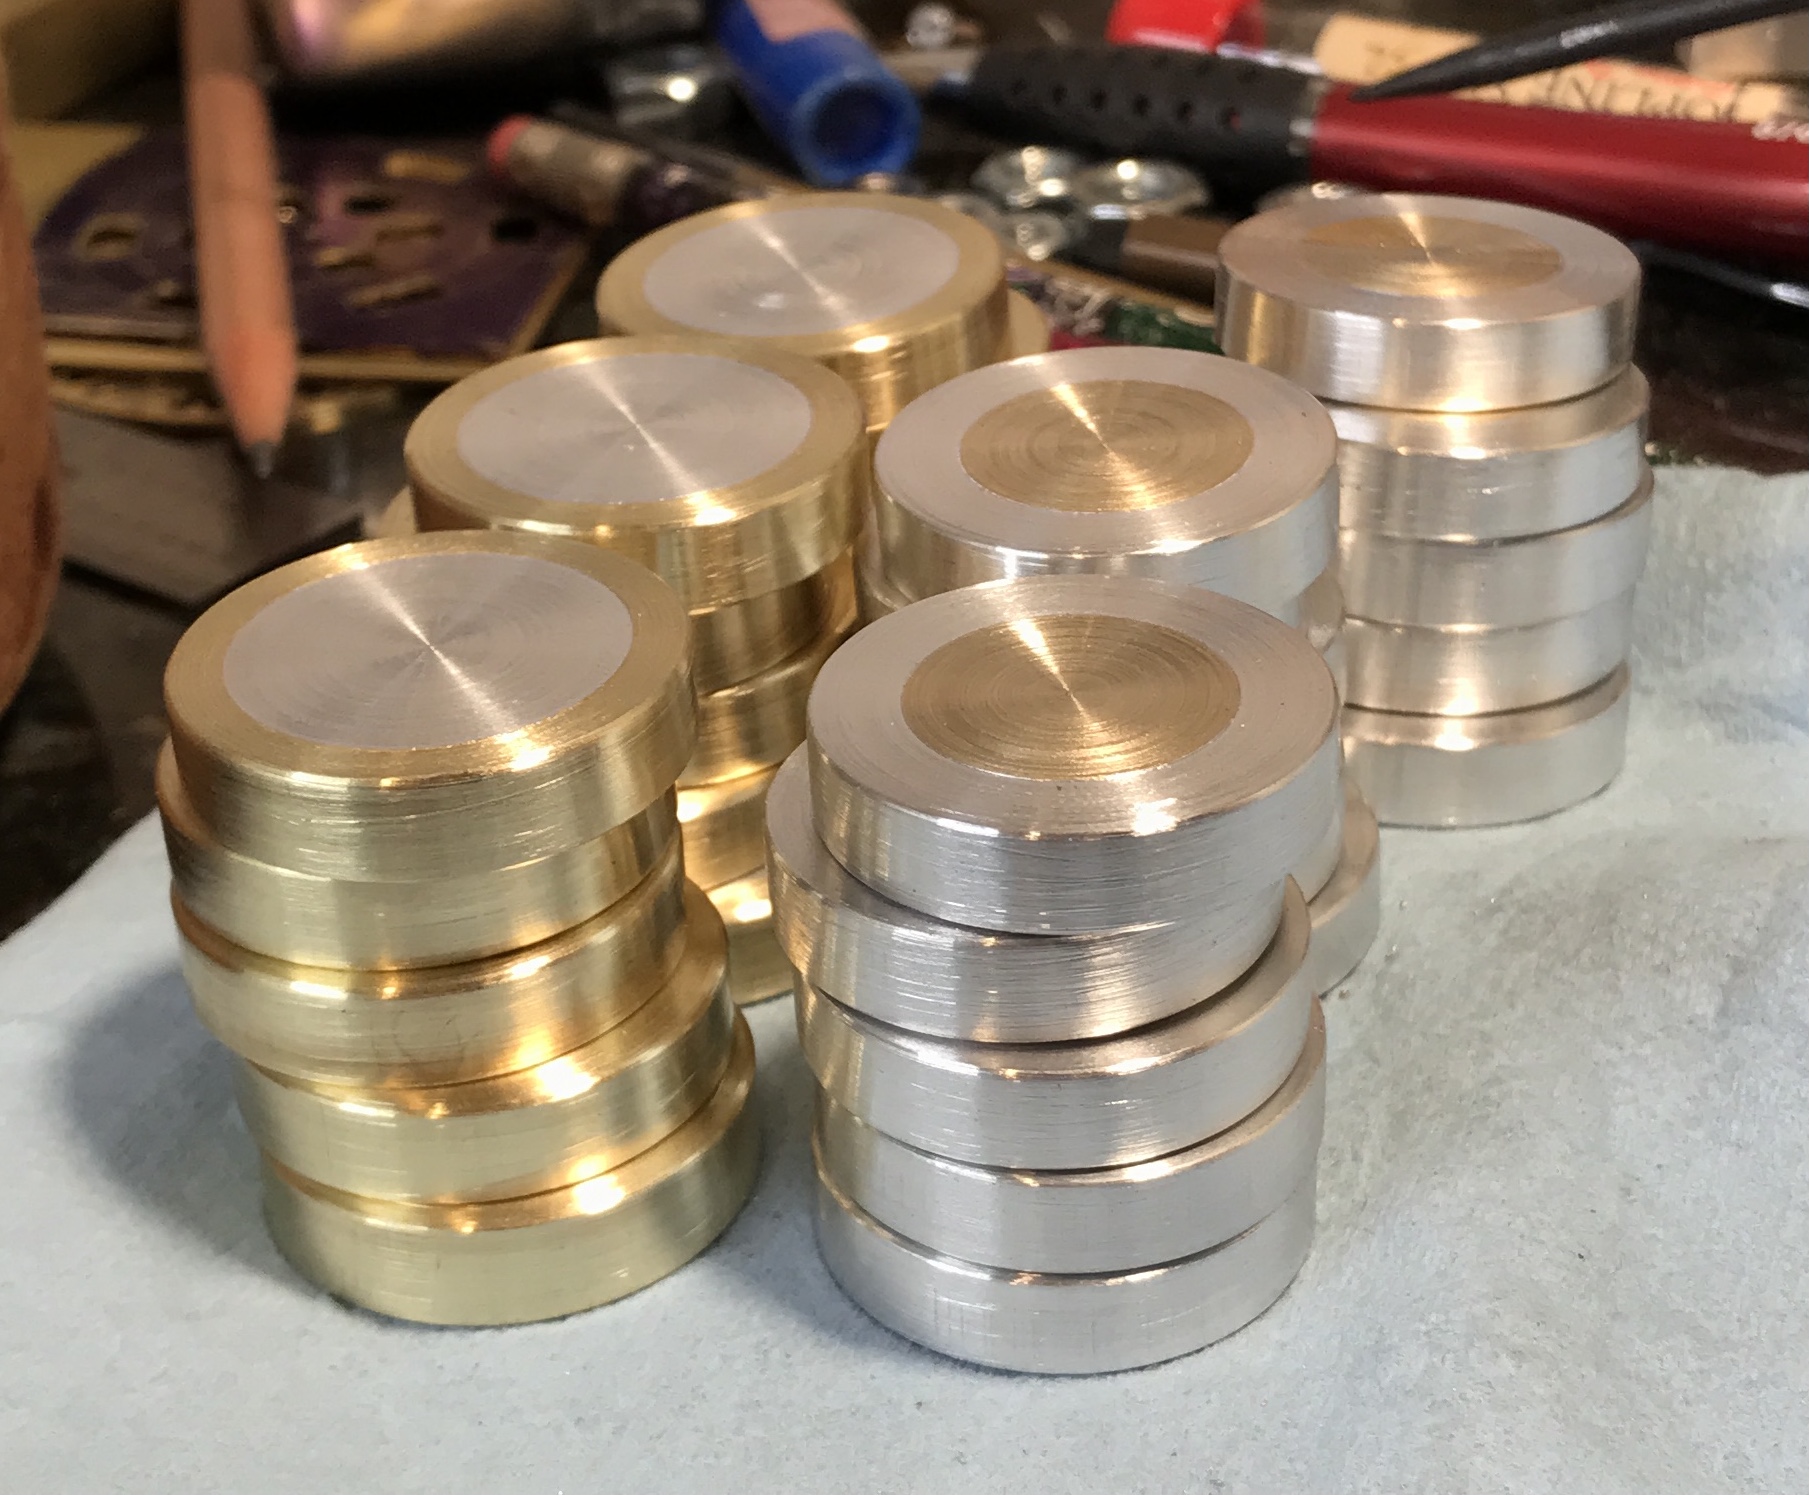
The disks were press fit into the rings with the small vise in the woodshop. Only one disk seemed a tad undersized, but I can't push it out by hand. One required the use of the large vise in the garage. Lightly chamfering the disks on one side helped the press fits. The thicknesses of the rings and disks varied more than expected. Mostly thinner than expected disks, but none were less than 0.250". The photo below shows the press fit disks and rings.
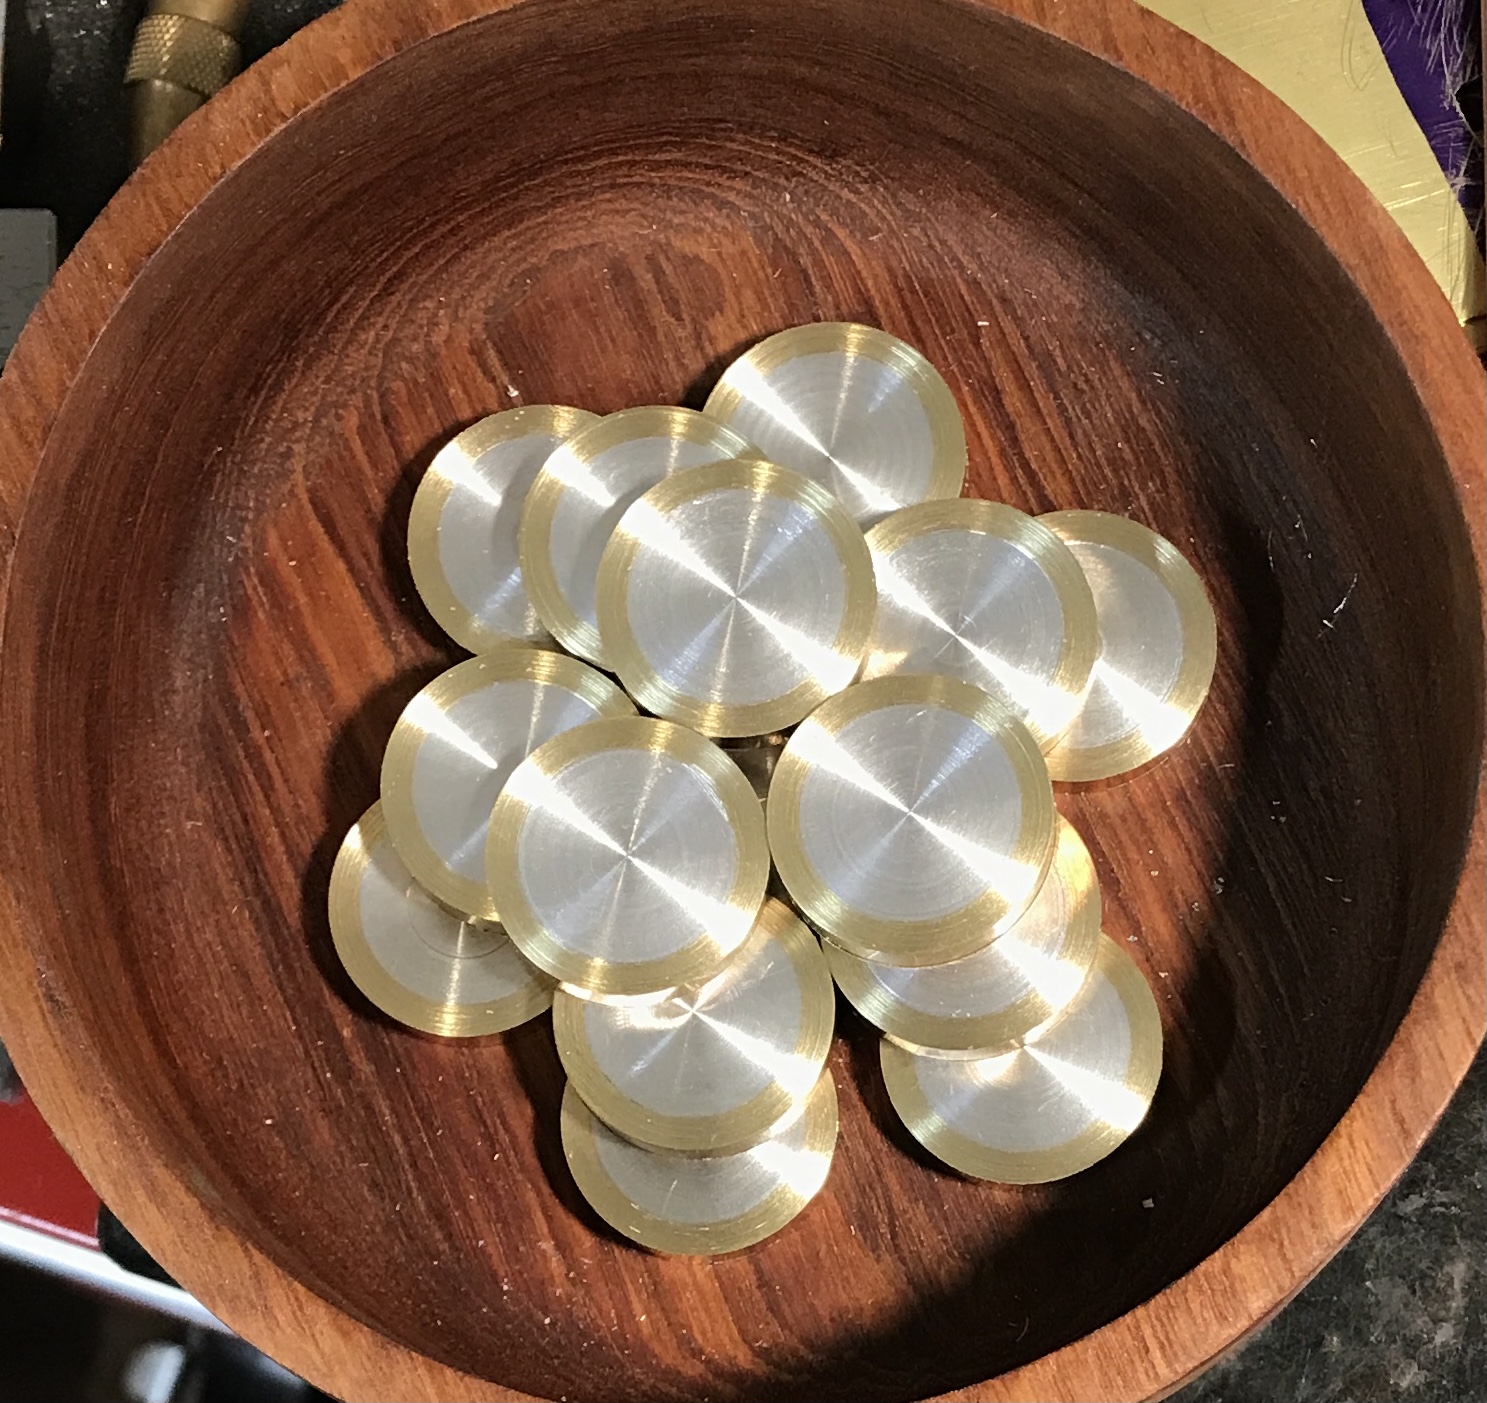
Began the facing. The best side was filed somewhat flat and the disk pressed against a parallel in the three jaw chuck. The opposite side was faced until it was flat. The disk was flipped against the parallel and the now worst side was faced to 0.25". Some of the disks had to be faced to less than 0.25" in order to get rid of most of scars. The picture below shows the fifteen playing pieces after facing.
When putting the fifteen new pieces into the holder one of the aluminum disks slid out of the brass ring. It is not clear how the entirety could have been faced with the loose center disk. Red Loctite was applied and the piece left to dry.
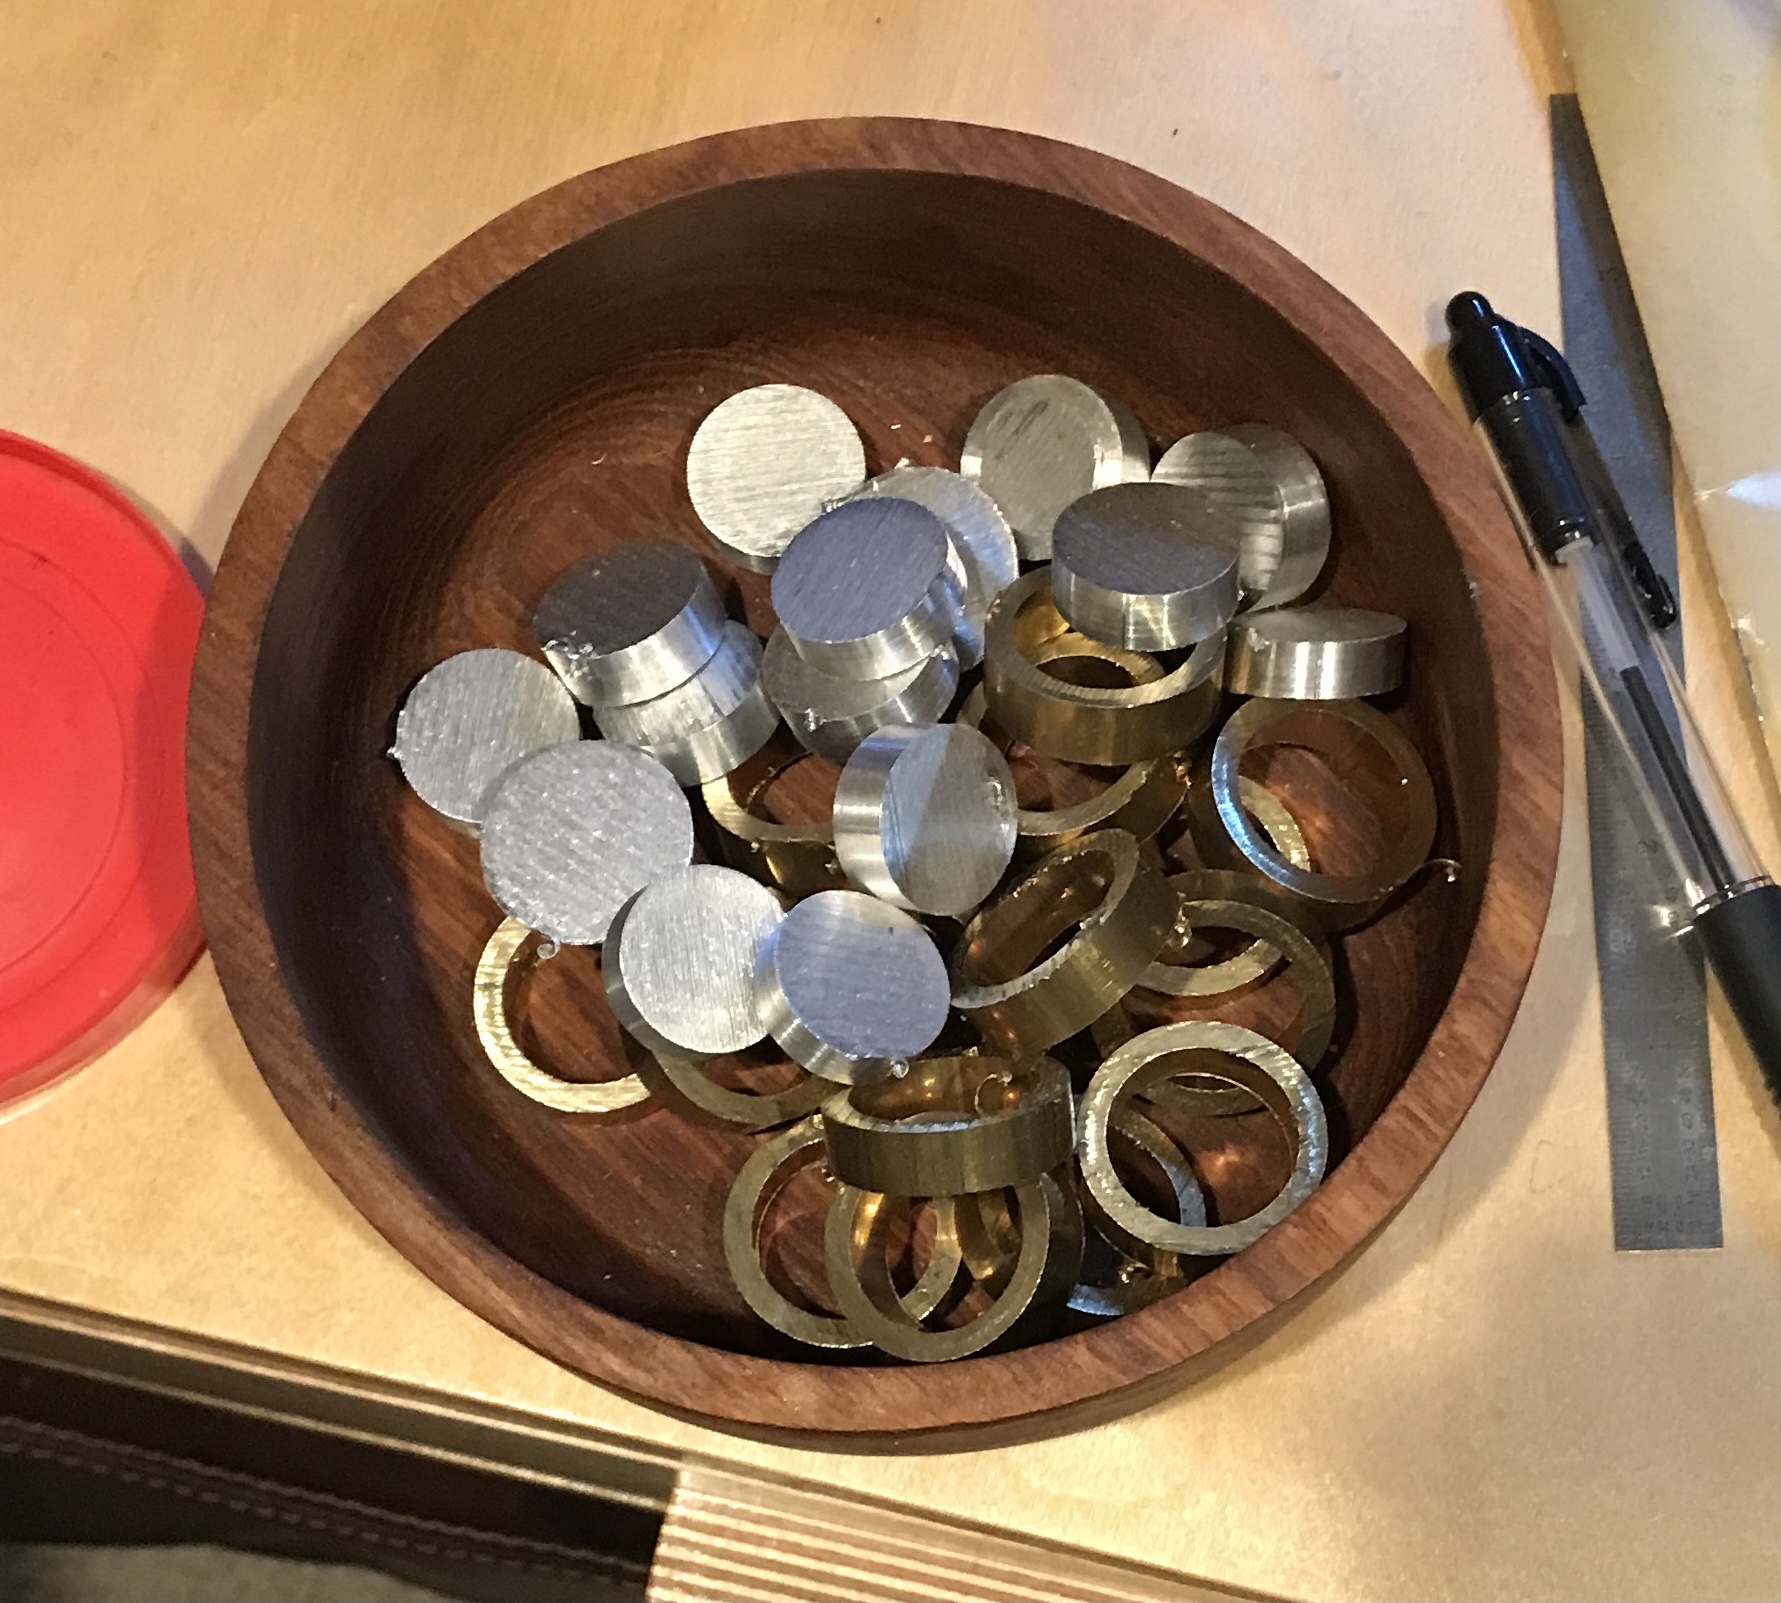
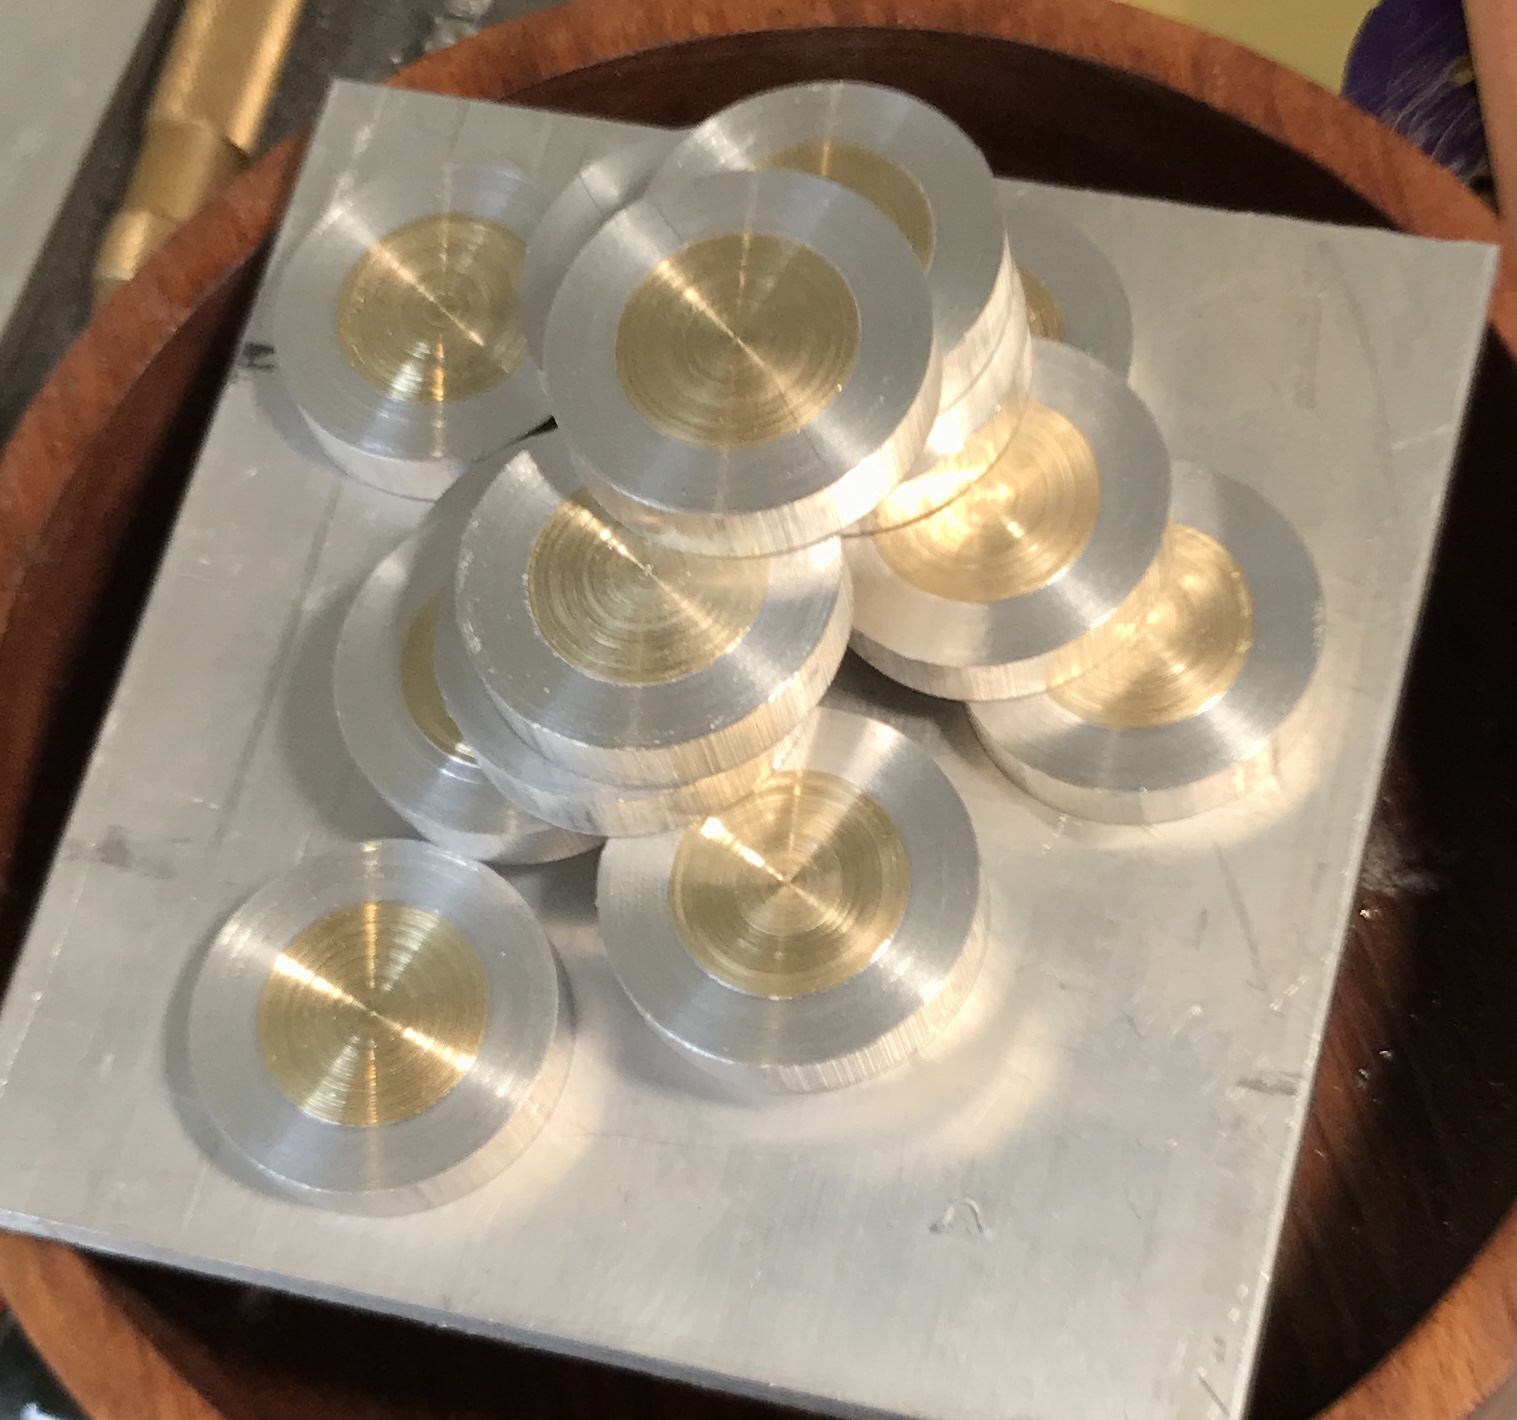
Spent the afternoon in the garage in the middle of February at 55°. Bored a 6" length of aluminum to 0.71". Attempted to match the brass for a press fit, but was not very successful. The non-press fits will be glued. The parts were cut off with the bandsaw to 5/16-3/8" long. Fifteen of each were made. The photo below shows the rough cut parts.
The brass disks were pressed into the aluminum rings. Three required gluing. All fifteen disks were faced on both sides and thinned to 0.25". The photo below shows the result of the past three hours work.
On to the edges. A jig was quickly made to hold the playing pieces to clean up their edges. Two scraps of aluminum were turned to concentric and flat faces. 1/4" had the diameter reduced to about 1/4" less than the playing piece diameter. One was drilled with a center drill. The faces then had a round piece of gasket material carpet taped on. The finished jig parts are shown in the first photo below. A playing piece was held between the two faces with gasket material in the lathe. A rotating tailstock center held the distal end with the opposite end held in the three jaw chuck. The second photo shows the setup.
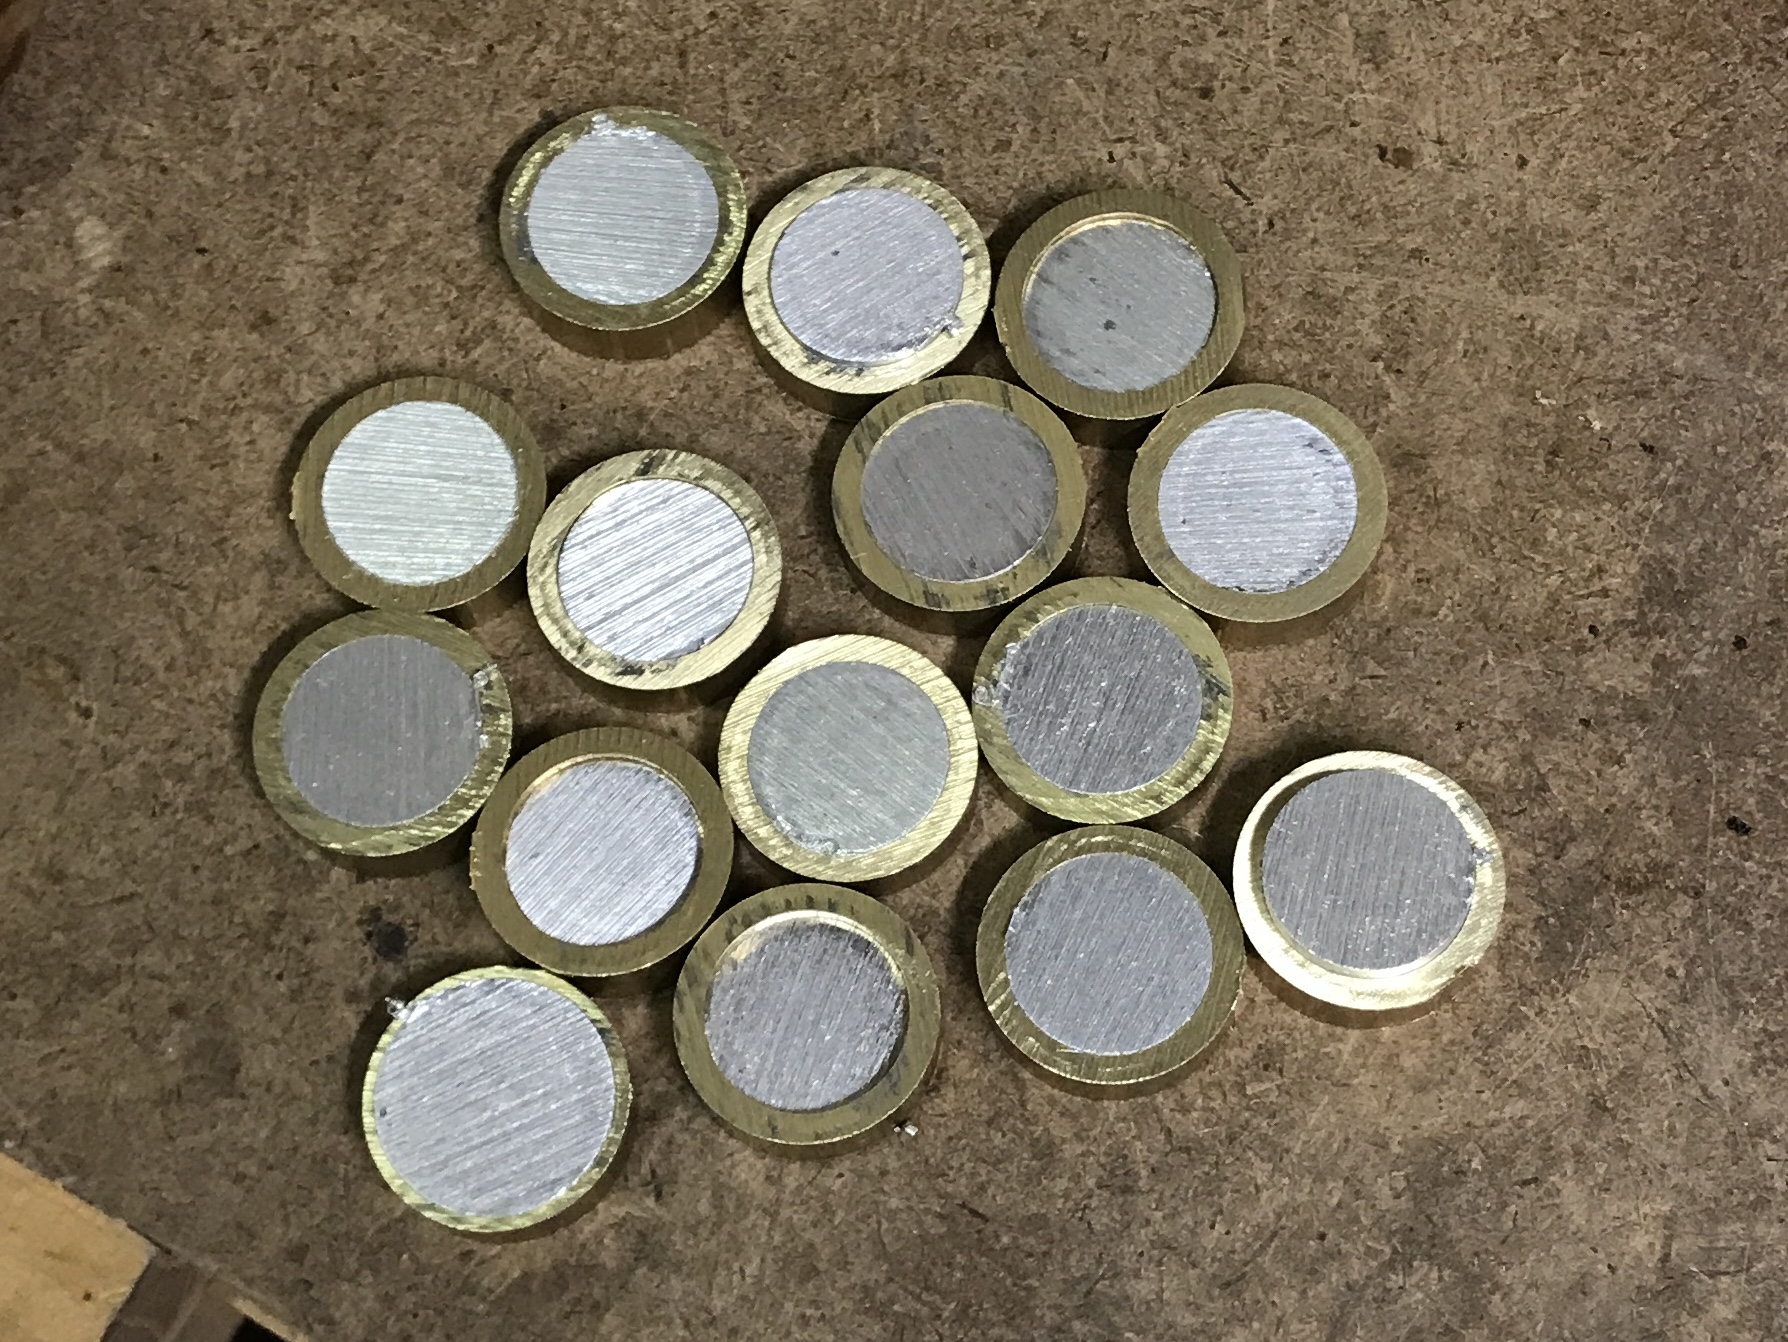
The brass edges were sanded and the corners rounded with many passes of a small file. The much rougher aluminum edges were filed smooth first and then sanded. The aluminum corners were easily rounded with a file. The thirty edge-sanded pieces are seen below.
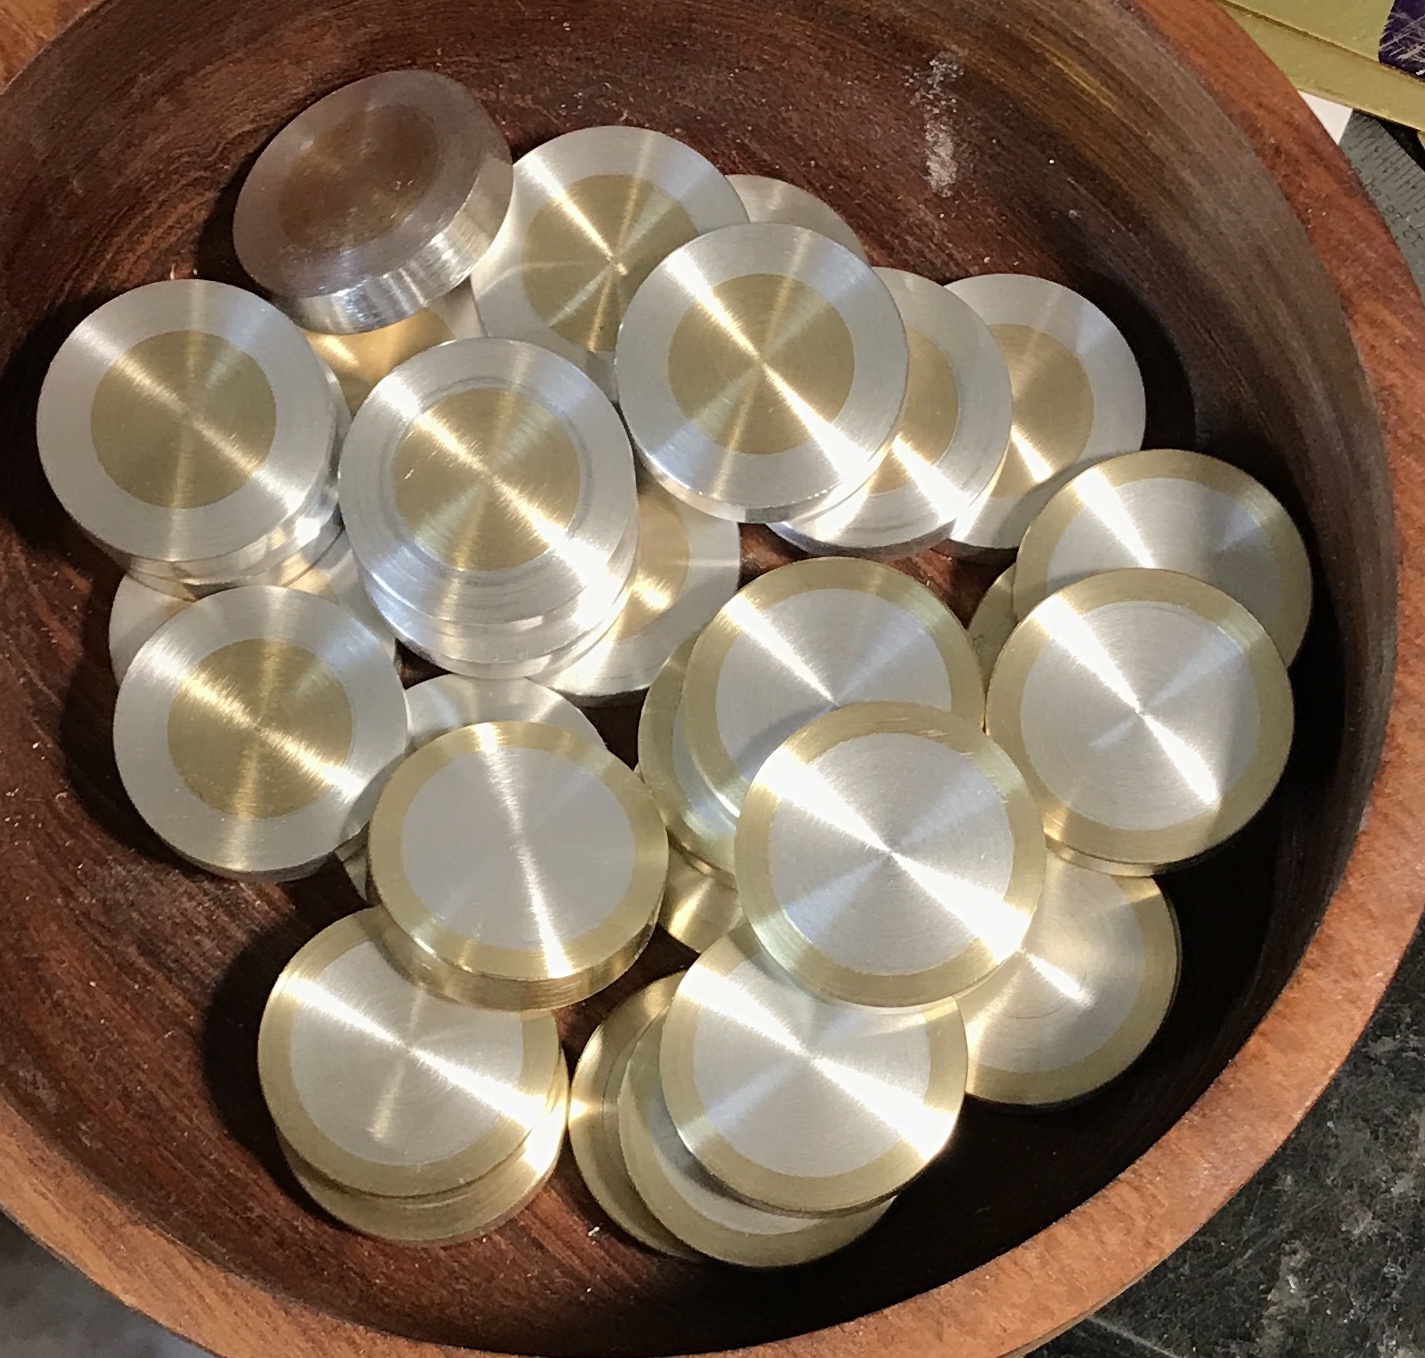
The past two days have been spent sanding the faces of the pieces. The aluminum tubes with brass cores were done first. The piece was held in the three jaw chuck using aluminum soft jaws. It was set so its face extended beyond the jaws using a 1/8" flat and a 6" rule. This provided sufficient extension with good holding. Each face was sanded with 120, 220, 320, 400, and 600 grit paper. The brass centers took the most work. A few pieces still had some sawing or lathe marks after sanding. I didn't want to spend more than five or six minutes on any face, since there are sixty faces. I took a break after every dozen or so faces. The photo below shows the results of this sanding.
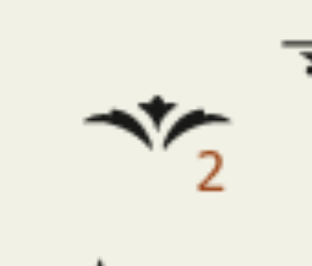
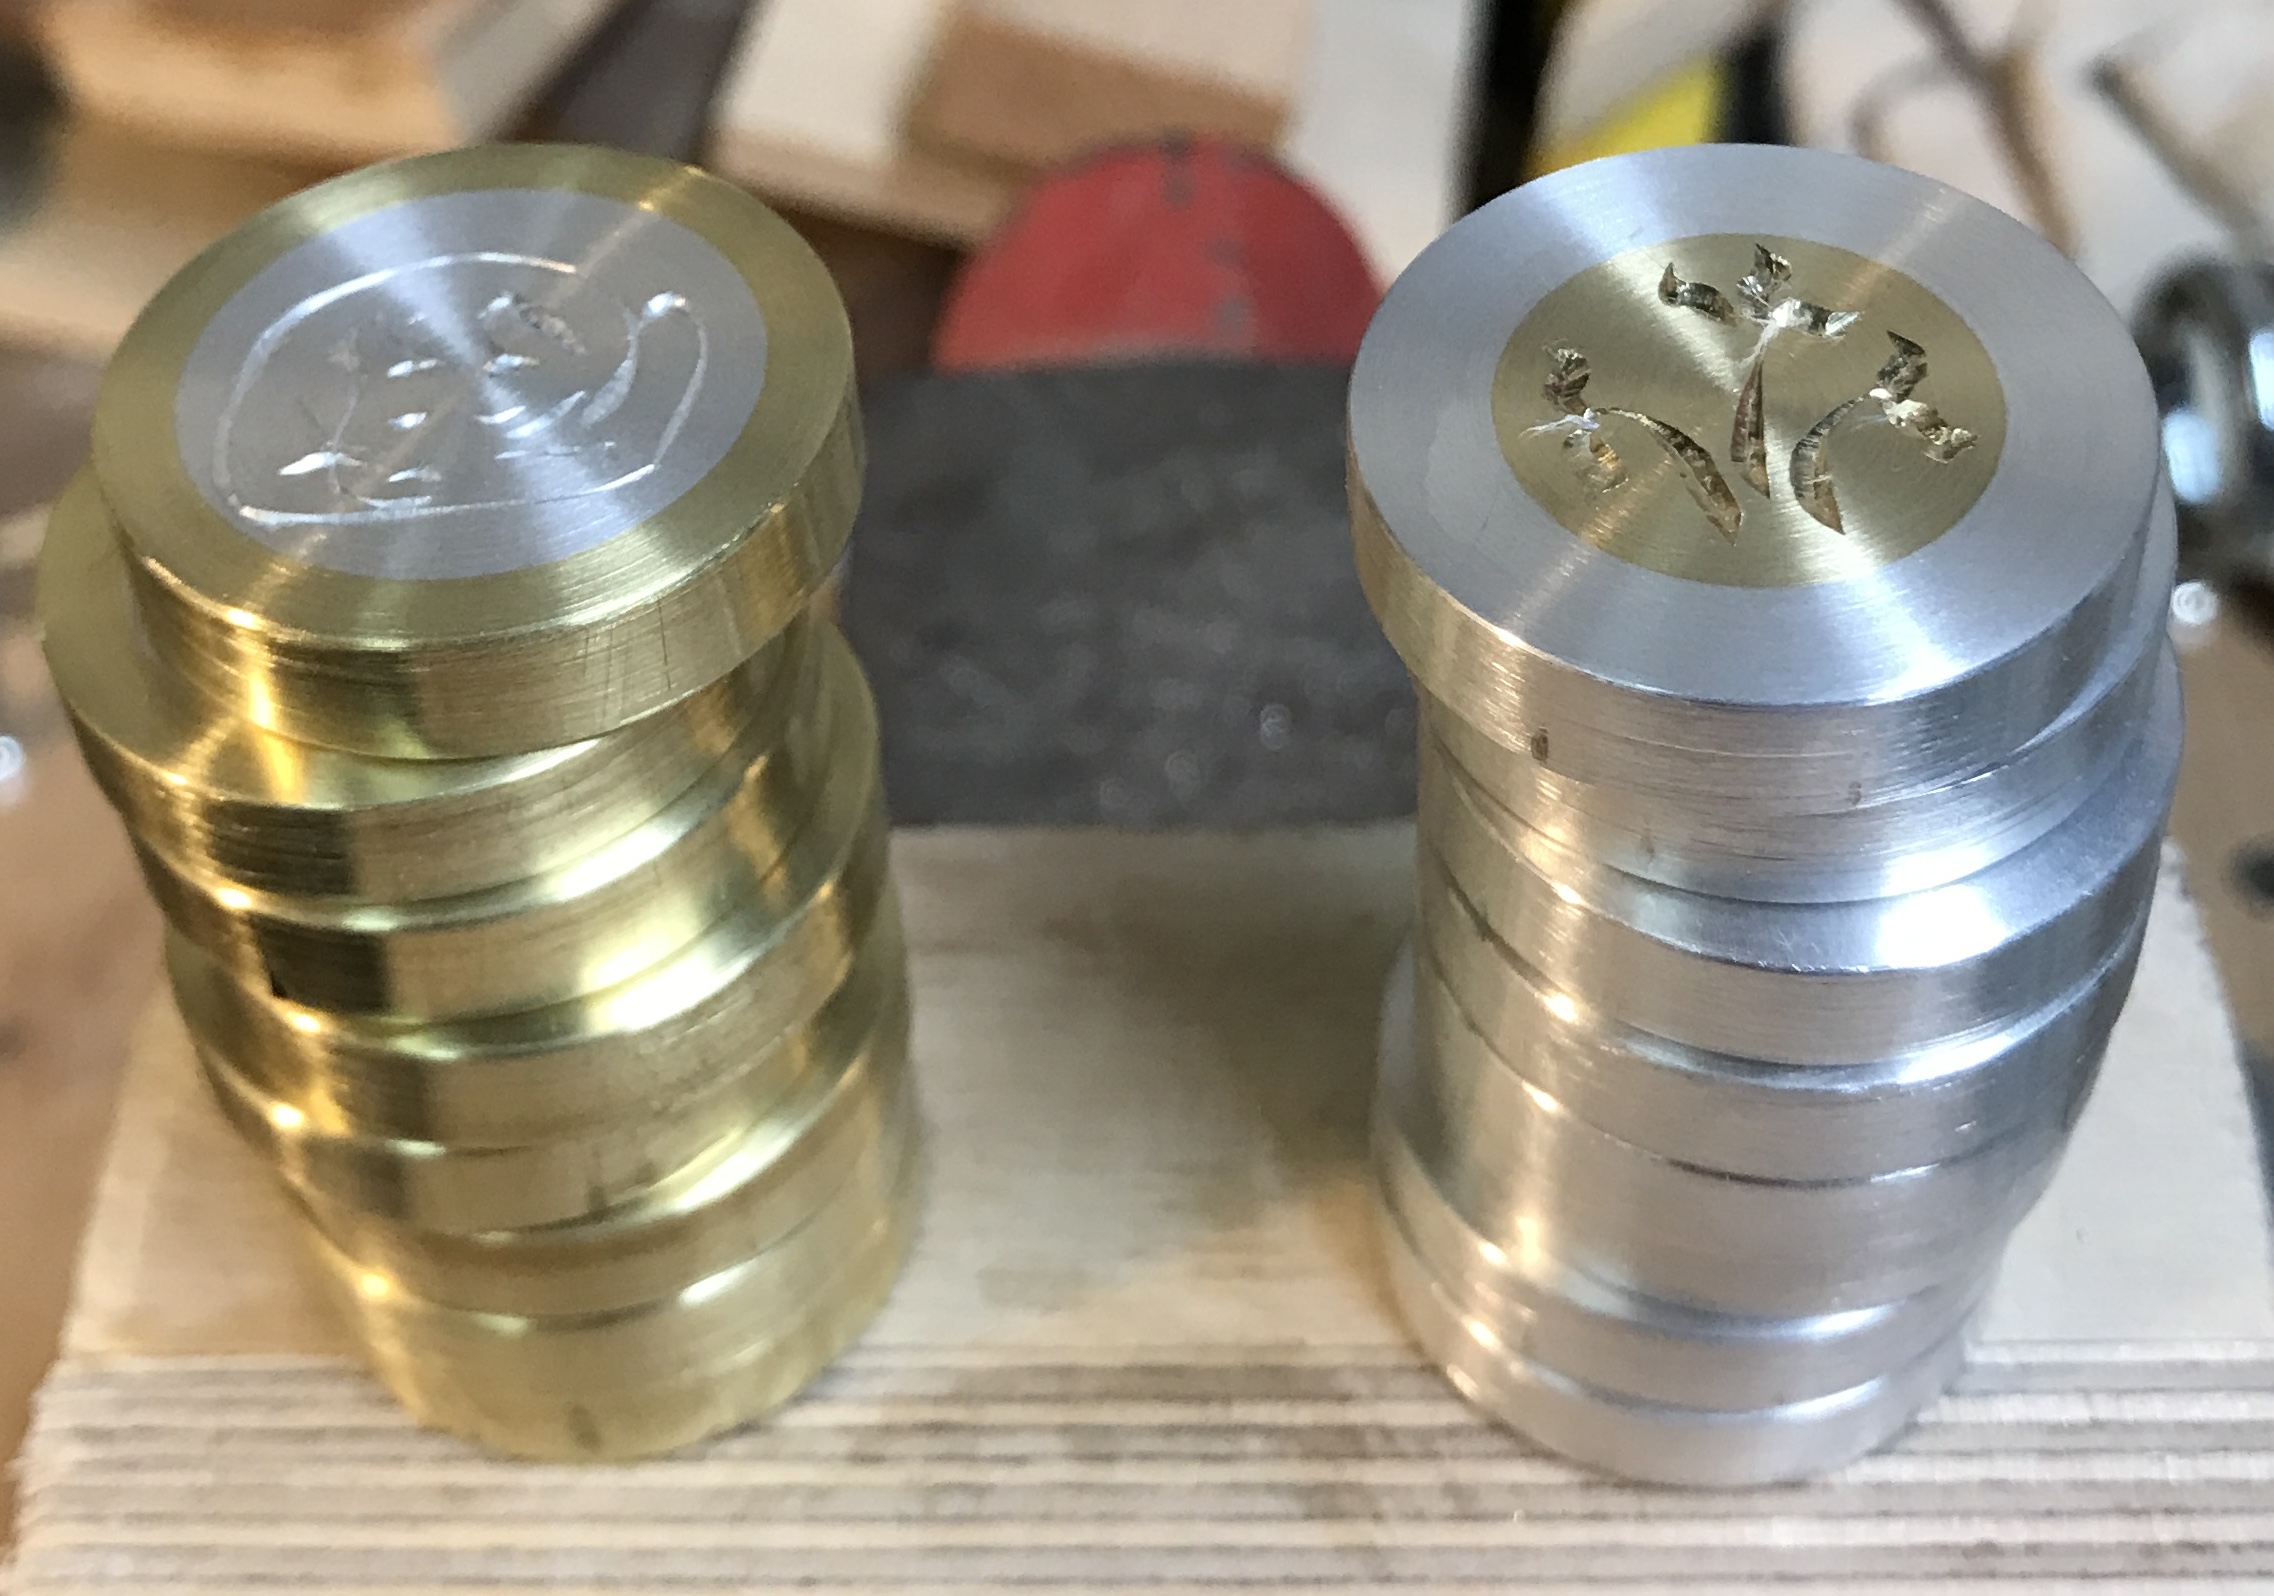
I am afraid that the pieces will be difficult to tell apart on the board, so the plan is to engrave something one at least one face of one set of pieces. The question is what? Went to Letterhead Fonts for some ideas. I settled on two letters (D & T) along with a scroll and a leaf. These are shown below. The T may need modifications.


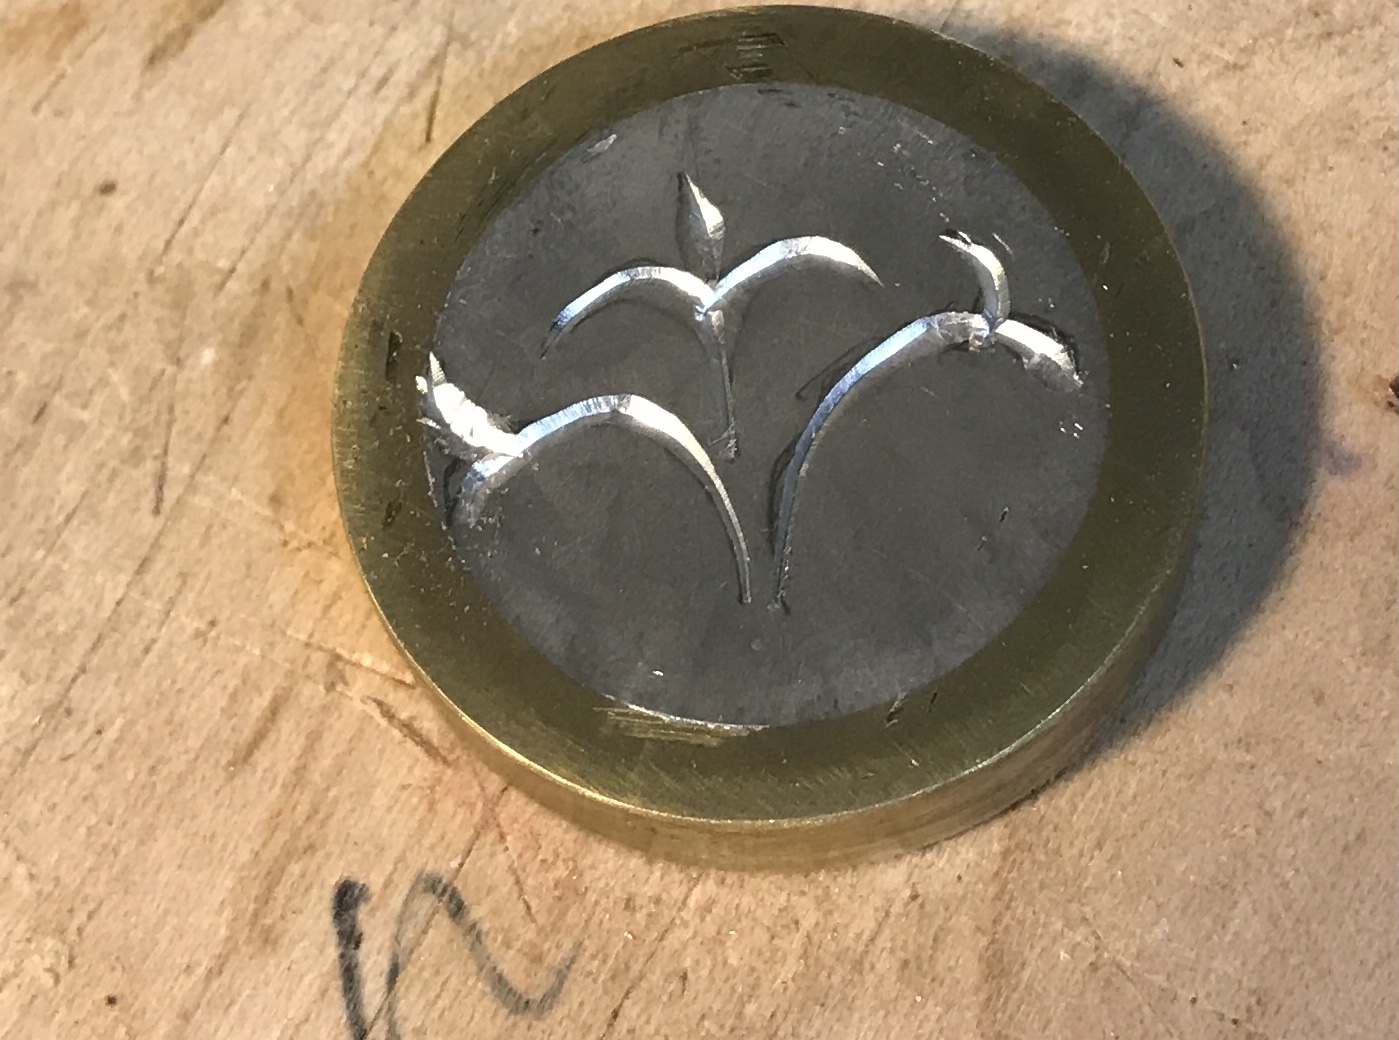
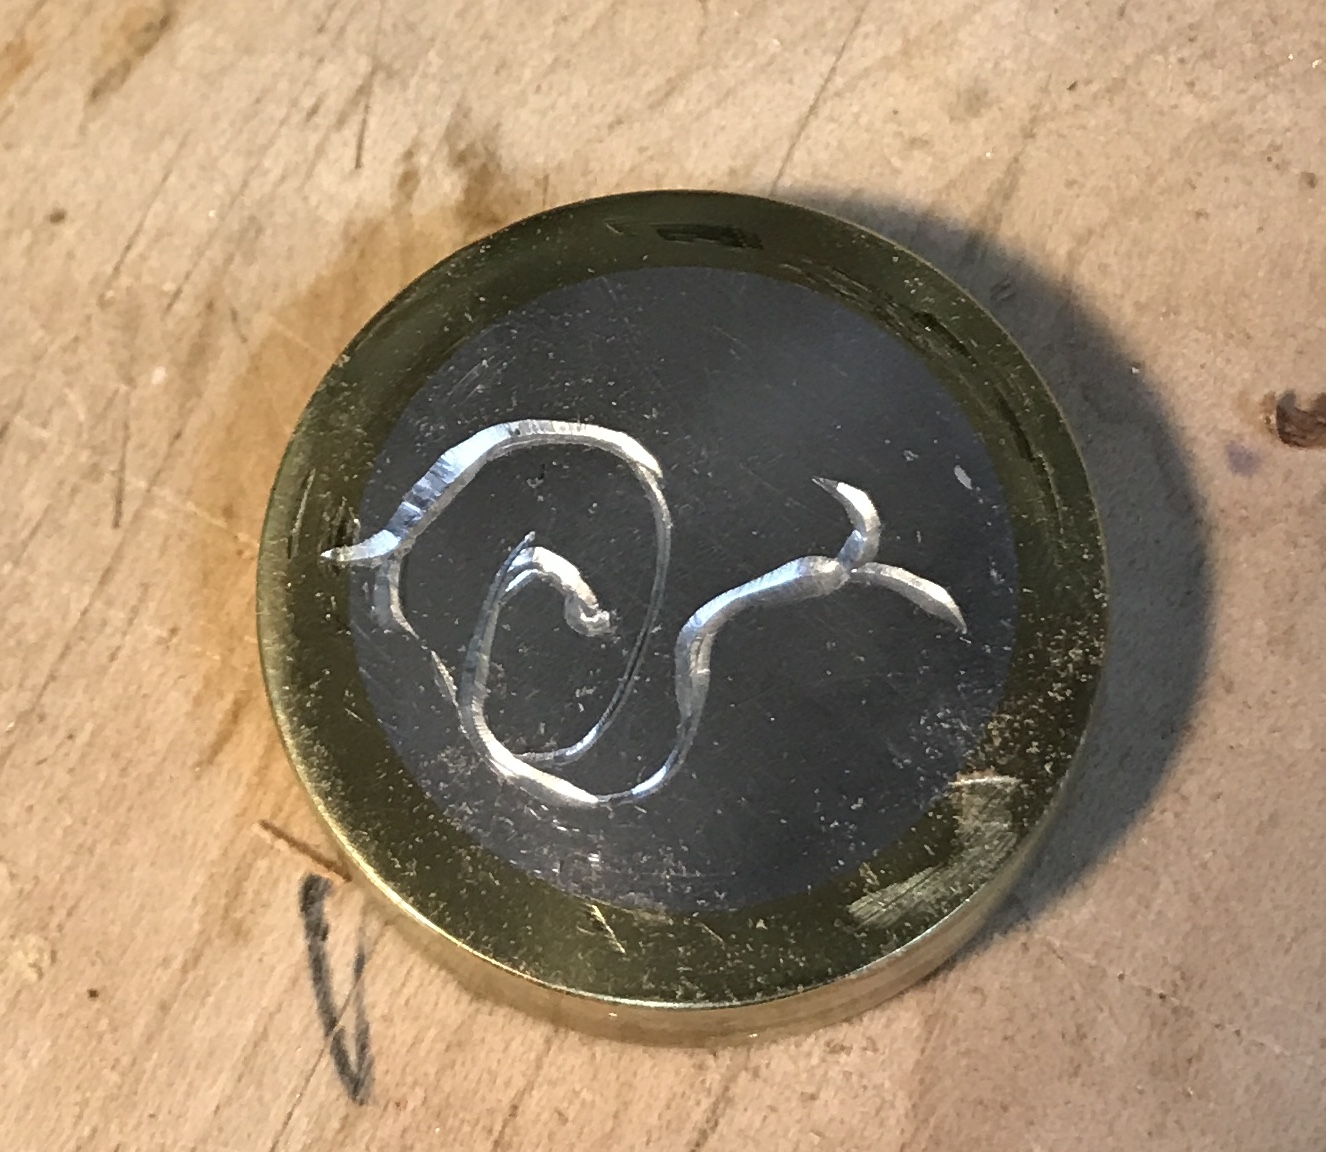
Two engravings were explored this afternoon after Tammy and Daniel were taken to the airport. Both were first practiced on a scrap of aluminum. Then the first test piece was engraved on both sides. One side had the leaf engraved and the other the small scroll. The two pictures below show the two engravings. The S-curves in the scroll image were more challenging. I plan to start with the fifteen leaves and that may provide the practice needed to successfully engrave the small scroll. I also need a better way to hold the disks in the engraver's vise.
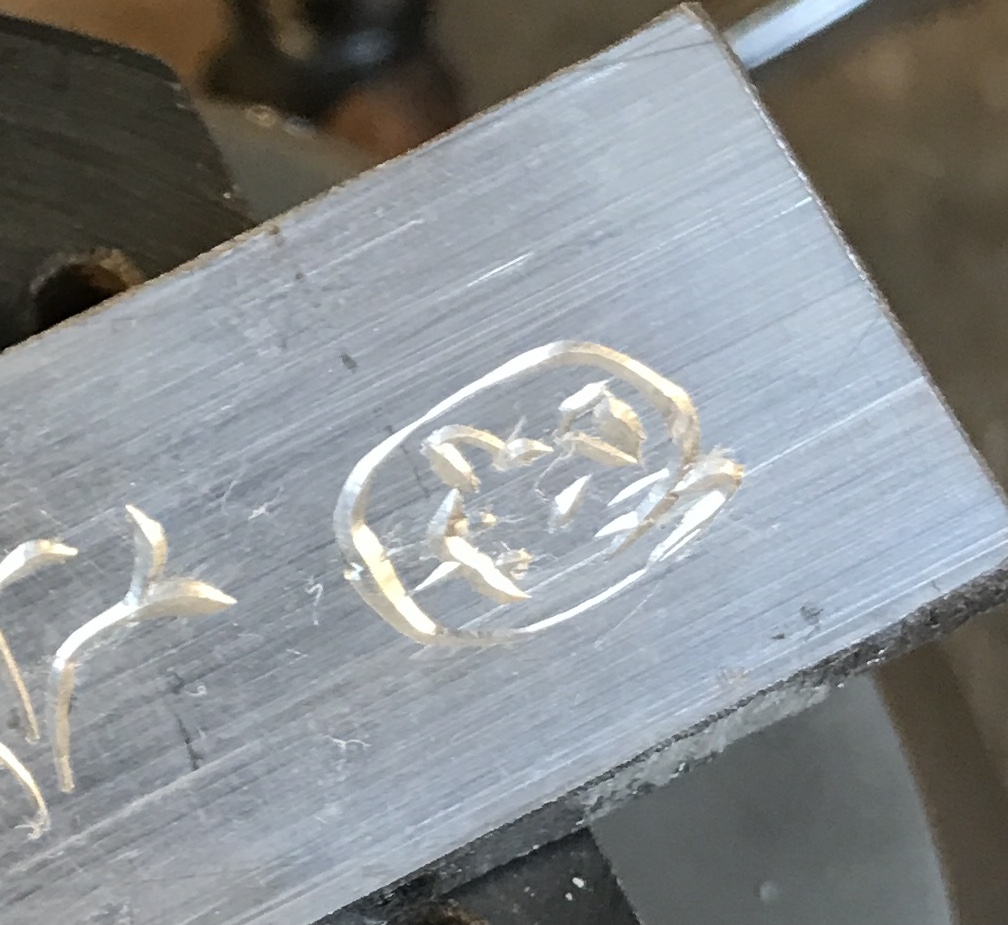
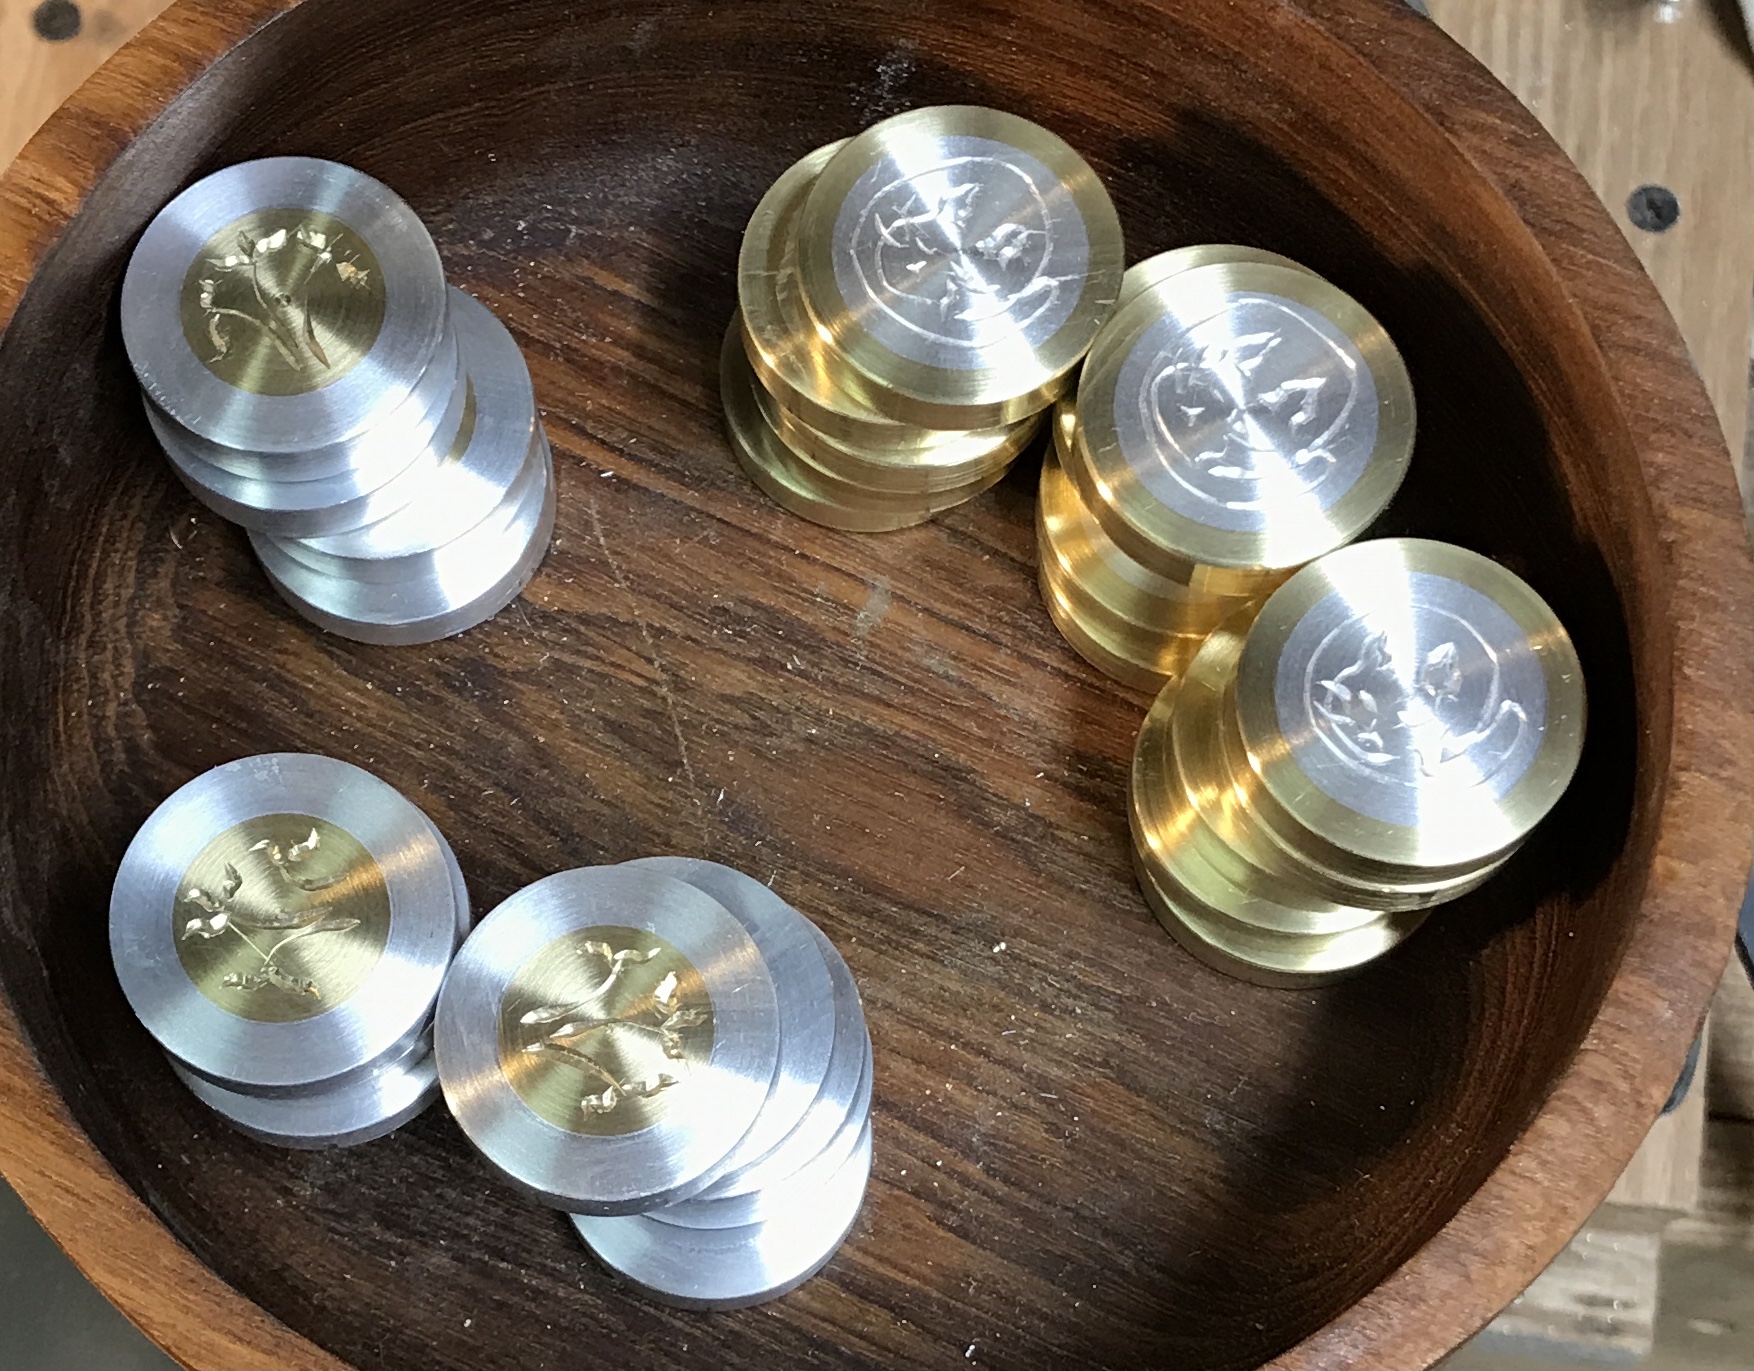
I decided not to go with the scroll. I like the leaf, but not the scroll. A cat seemed more appropriate. After looking at a few cat pictures, I settled on a design. It is shown in a test engraving in the first picture below. I then bit the bullet and engraved a cat in an aluminum centered piece and the leaves in a brass centered piece. The brass is quite a bit brighter. After two hours of effort half of the pieces were engraved as seen in the third photo.

The cats were completed this morning, the last day of February. One piece started rotating during the engraving and had to be reglued. Other than that all went fine. The only remaining work on the playing pieces is polishing and varnishing.
Some experimental polishing was explored. First a Q-tip in the Dremel was tested after taping over the brass center of a piece. The Q-tip did a poor job polishing the aluminum. The polishing wheels were tried next. Both the aluminum wheel with white rouge and the brass wheel with red rouge worked well. There was no darkening of the aluminum. The only challenge is getting all of the blackened rouge out of the engraving.
A few days later the polishing was started in earnest. An odd type of wrench was found in the toolbox and used to hold the pieces, which become quite hot during polishing. Aluminum soft jaws were quickly made by bending small sheets of aluminum around the plier jaws. (The aluminum was from the 469AJF license plate my Acura TL sported for many years.) After over an hour fifteen pieces were polished. The photo below attempts to show the difference, which is quite striking to my eye, but does not show up well in the photo.
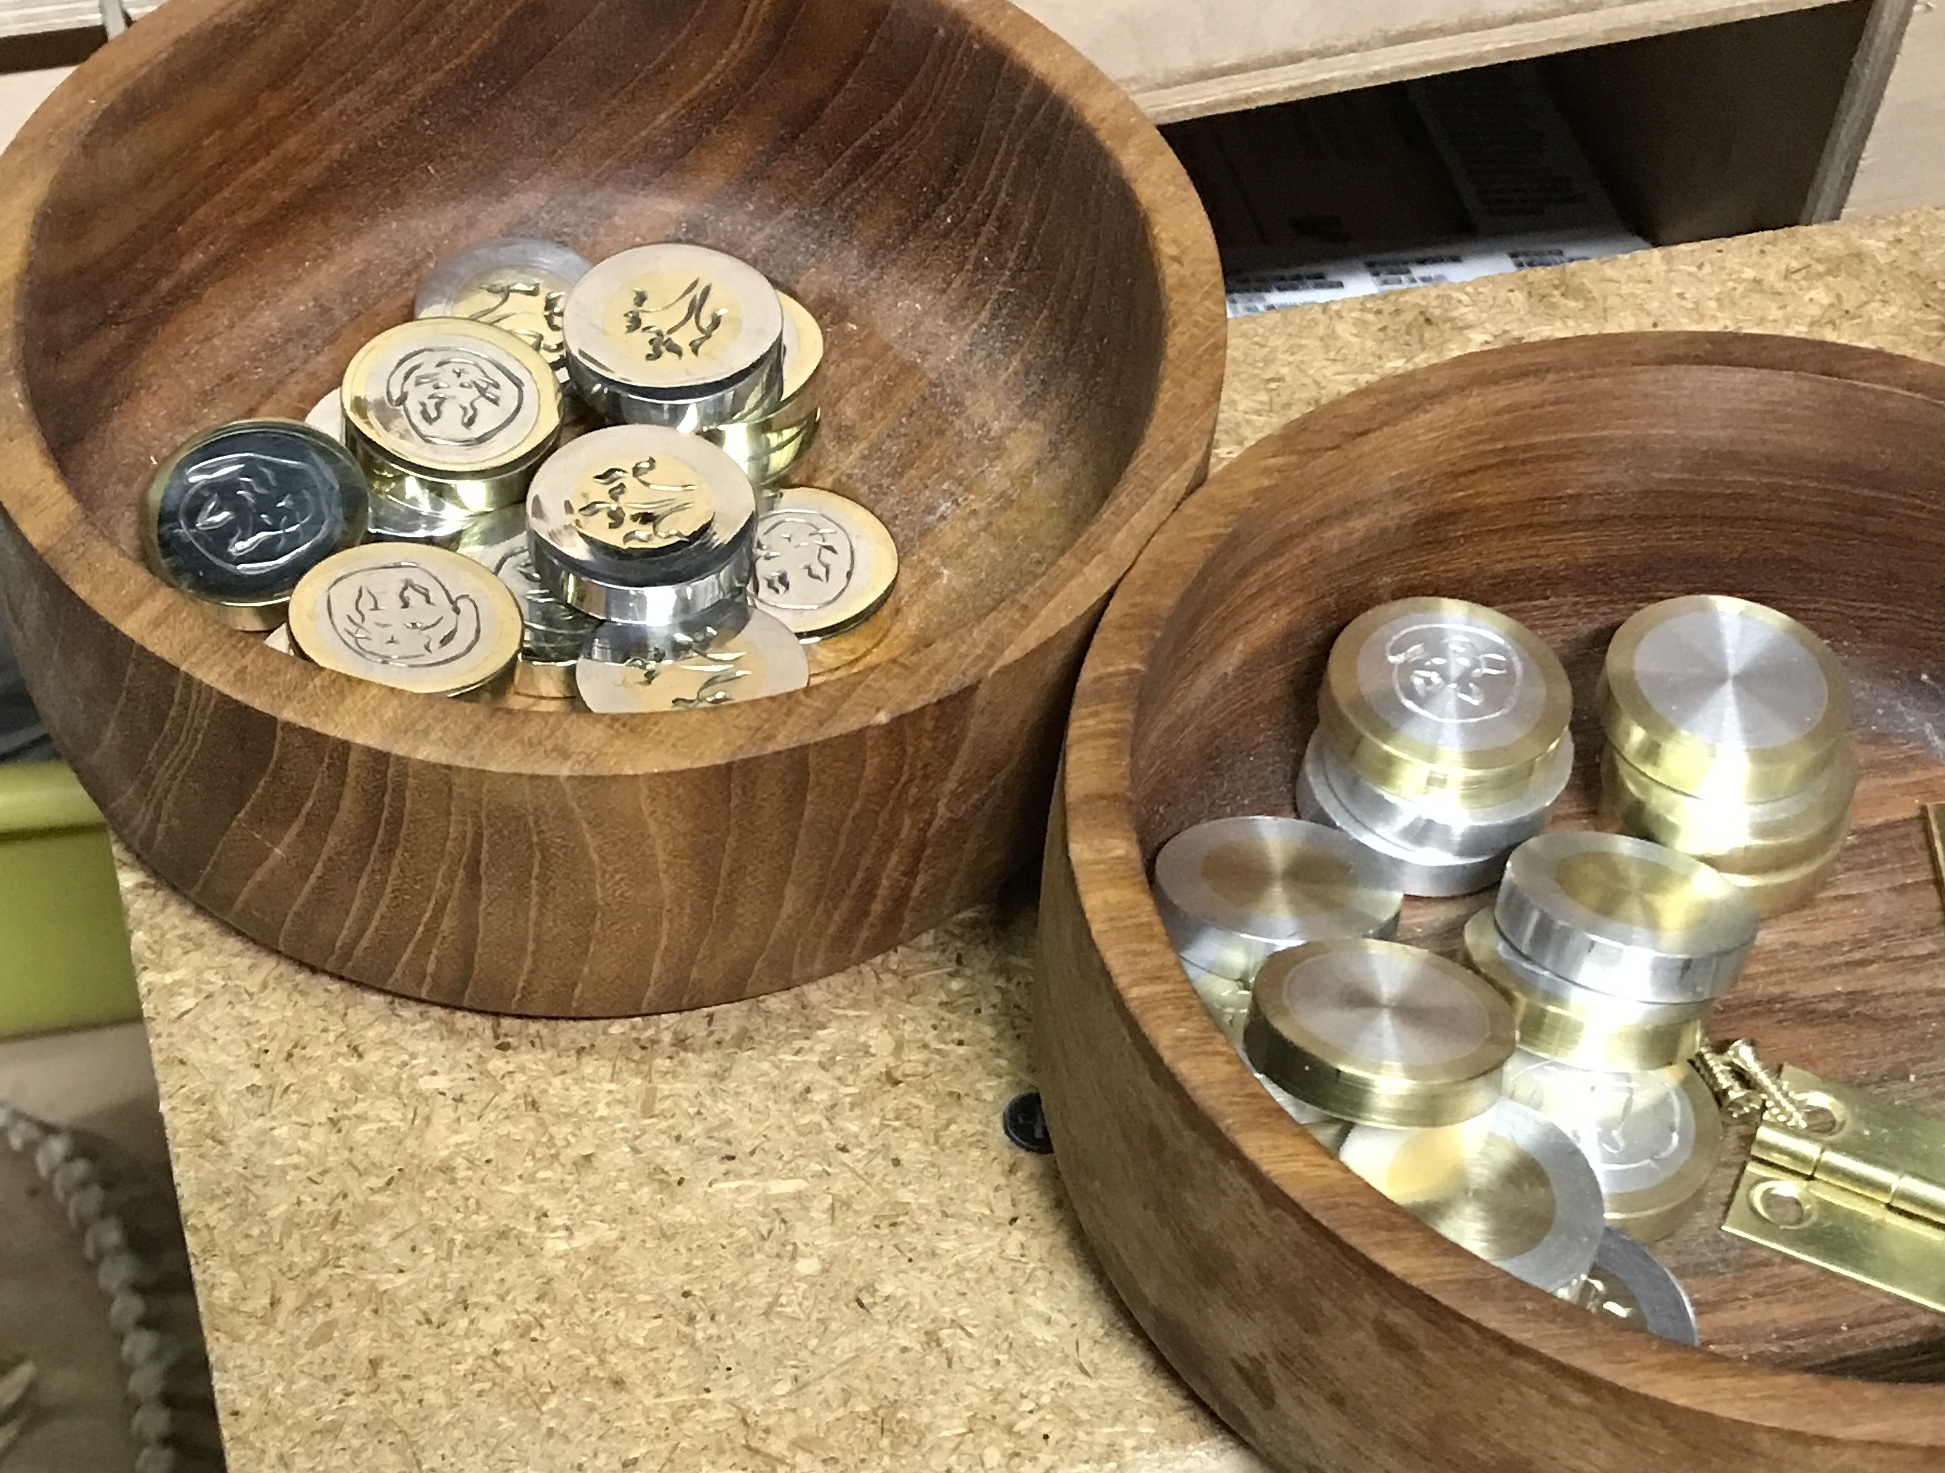
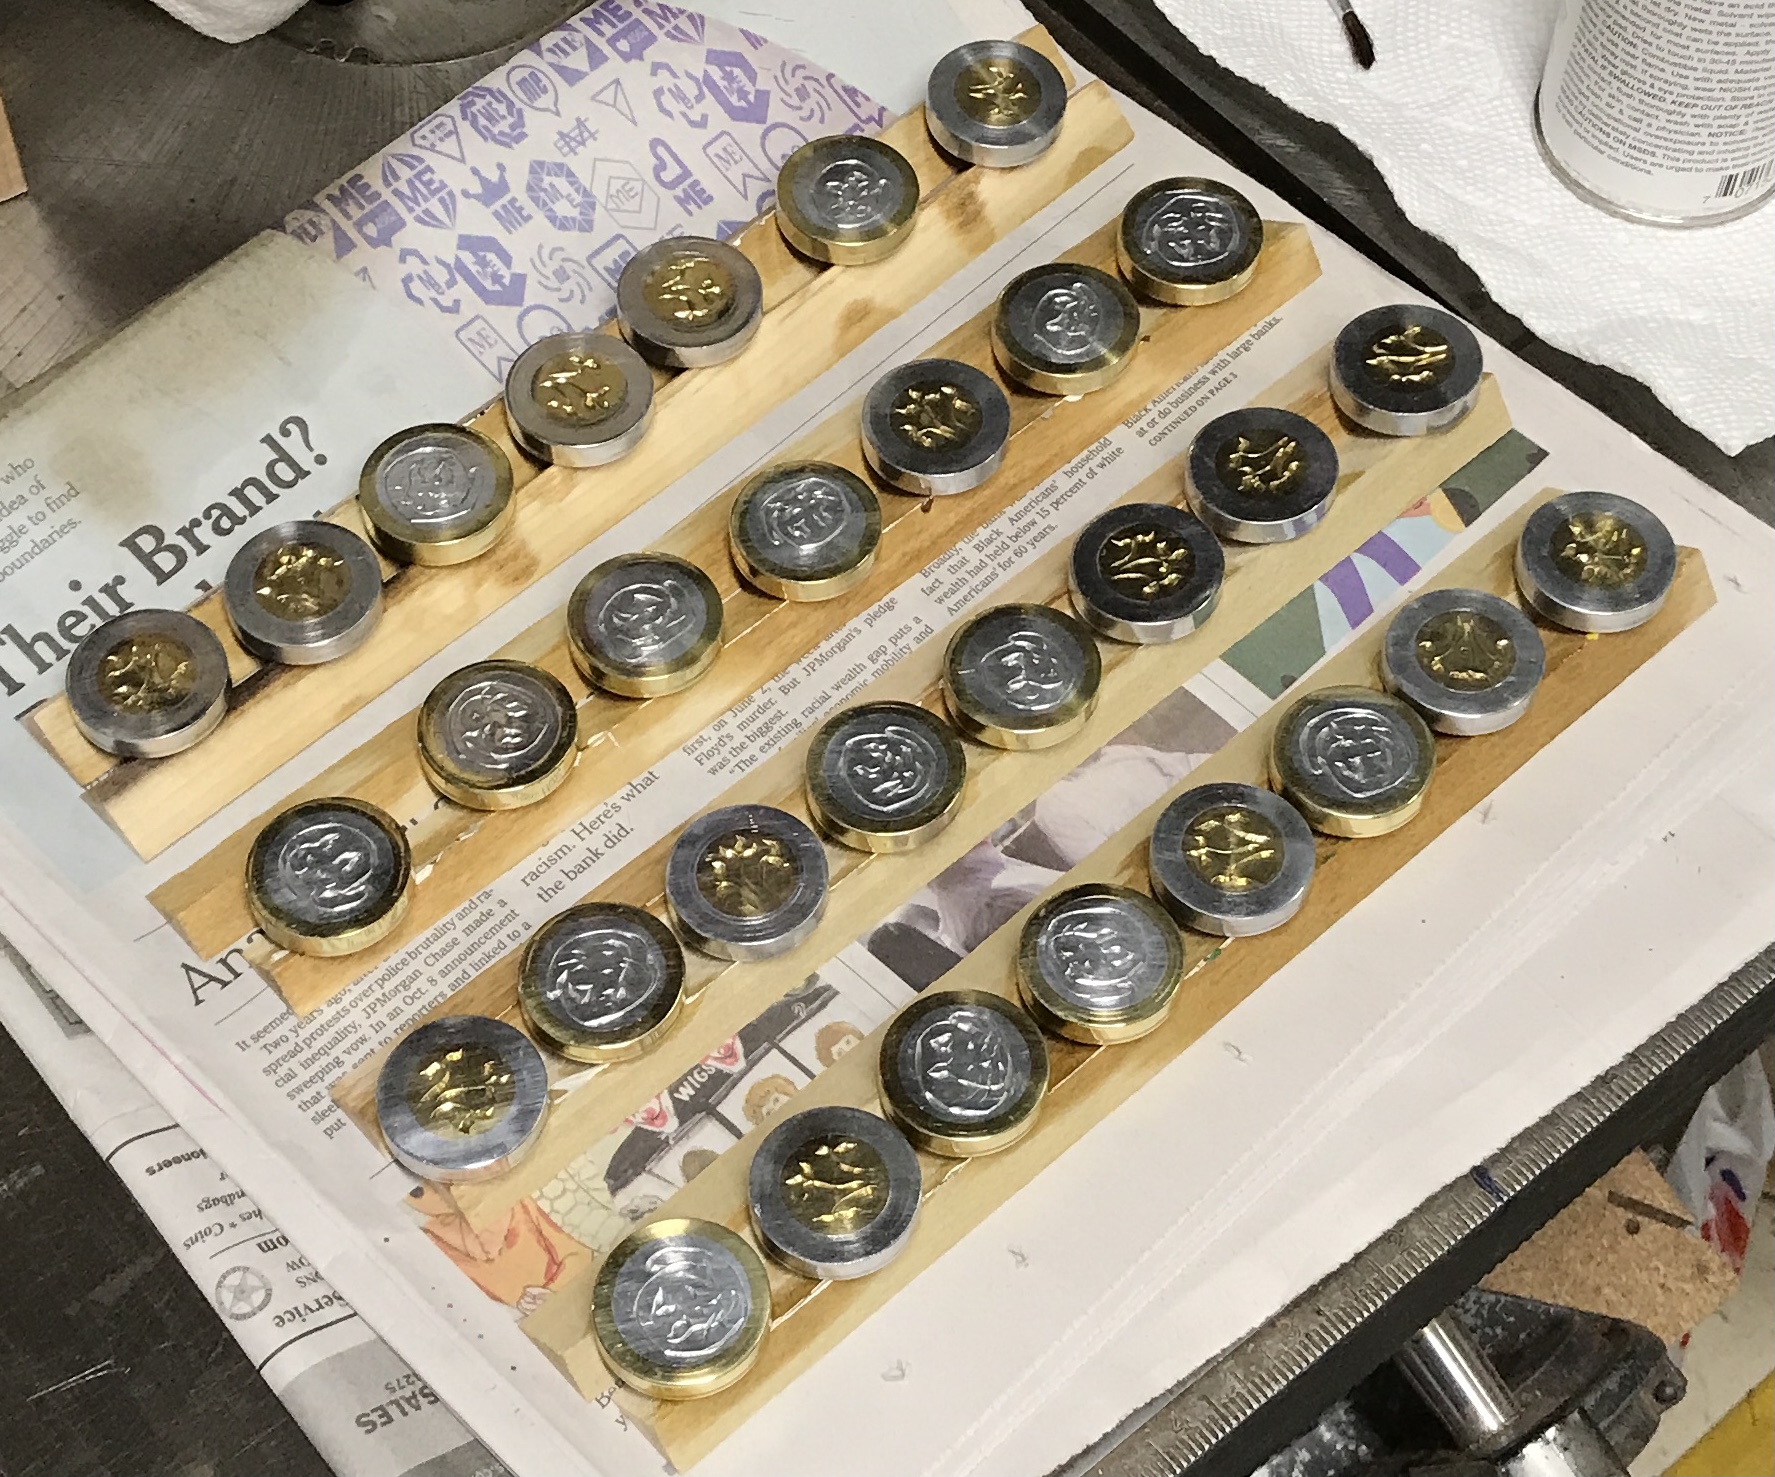
The remainder of the pieces were polished this morning. After lunch the pieces were washed with soap and water. Most of the black polishing gunk was removed with a scrub brush, but a pick was needed to dig some of it out of the engraving. After washing the pieces were thoroughly rinsed, placed in a NaHCO3 bath, rinsed again, and rinsed with acetone. After the acetone rinse the pieces were handled with rubber gloves. The pieces were given their first coat of ProtectaClear varnish on the tops and sides. The photo below shows them drying after this first coat.